- Computers are NOT needed for lab this week
- Jeff will print enough copies of the three magnet templates for all students
- Template printing options: single sided and sort (not collated!). The best way is to print one page at a time to avoid wasting paper!
- There are 5 primary experiments set up: B around bar magnet (2 stations); B around solenoid; B around small coil; B around straight wire (uses the vertical segment of the square wire coil); and the old computer. Since all groups share the apparatus, the order that experiments are performed does not matter
- The solenoid is powered by a dual-power supply. Depending on the power supply used, two buttons may need to be pressed to turn it on: the main Power and the Output buttons
- Calculating B for solenoid; since we no longer use a Gauss meter to measure B directly, the instructions give 8×10⁻³ T as the actual value (**see note below):

- During setup, several of the stations have many compasses in place for students to visualize B. Those compasses have been chosen so that they all point in the same direction. If a compass is found to be reversed, replace it with a correctly oriented compass, and set the backward one aside for repair
- An ancient computer with a CRT display is also in the lab. Students can wave a bar magnet along the display to see the distortion
- During the Spring 2025 semester, the hard drive on the original Magneto computer failed, so I've replaced it with a PowerMac 7500 that I bought in 1995. Details on its specifications and usage are at the end of this document.
- A large horseshoe magnet is also in the lab. Students use this to check that their compass is pointing along the correct direction of B (out of north, into south), and to check the orientation of their bar magnet (the bump or white dot is North).
- The square coil (B around straight wire) and small vertical coil now have switches that easily allow the current to be reversed.
- Small vertical coil: The power supply is set to 3.0 volts DC. The switch is labeled Direct and Reverse. Students should use Direct first. The wires are color-coded (red and black) so that you can see the direction of current each way
- Square coil (straight wire): Set the knob on the green LabVolt power supply to '5' (the range switch is flipped up to Range A). A tap switch is labeled Direct and Reverse. Press and hold the Direct switch to send current down through the board holding the compasses. Press and hold the Reverse switch to change directions
- The horseshoe magnet is also used for the 'jumping wire' demo.
- Set the knob on the green LabVolt power supply to '5' or '6' (the range switch is flipped up to Range A)
- Lay the wire between the magnet poles (supported by the 4x4 wood block), and talk students through the right hand rule usage. Make sure the direction of I is such that F will point upwards initially
- Quickly press the tap switch. This momentarily shorts out the power supply. If the current is in the correct direction, the wire will fly out of the poles
- Ask students what will happen if the current is reversed. Use the right hand rule again to demonstrate, then loop the wire around so that I is in the opposite direction. The wire will attempt to move down through the wood block
- For some reason, students have difficulty understanding the point of Experiment 4, where they have to calculate the amount of current that needs to pass through the large solenoid to produce the same B as their bar magnet (I ≈ 15A) and the horseshoe magnet (I ≈ 50 - 75A). Holy current, Batman!
- **The gaussmeter probe was broken during Spring 2023, so I gave them the 'actual' measurement of B for a bar magnet (40 mT), the horseshoe magnet (195 mT)and the solenoid (8 mT). Since the gaussmeter probe is fragile, and they really can't use it without assistance, I now include these values in the directions. The following is kept for historical significance
- Advise students about the correct use of the gaussmeter. It's very expensive (~$1k!), and the tip is fragile, so keep the plastic cover over the tip at all times. The meter should have been set for auto-range, and will measure the field on the order of mT. Make sure the flat part of the tip is perpendicular to the direction of B; this will give the maximum readout
- Historical note: The original Magneto was used for this experiment until the Spring 2025 semester, when the hard drive failed irreparably. I replaced it with the PowerMac 7500 in my office, and that will be used going forward. Here are the original notes about Magneto:
- Unless I get around to replacing the internal battery, the computer will beep twice and produce an error screen on boot (and the computer thinks it's January 01, 1900!). Jeff will (hopefully) remember to boot the computer before each lab
- Note for computer geeks: this is an IBM PS/Valuepoint 433DX/S, circa 1993 {Wikipedia page} that was used in our labs. It runs Windows 95, has 16 MB of RAM, a 200 MB hard drive, and Intel 486SX processor running at 33 MHz. Much less powerful than the phone in your pocket!
- Specifications and usage of PowerMac 7500 (Magneto 2 - Figure 1):
- This was my home computer, purchased in 1995. It originally had a PowerPC 601 processor running at 100MHz, but I installed a 450 MHz Sonnet Crescendo G3 processor and upgraded to 432 MB of RAM so that I could run early versions of OSX. It currently has two hard drives (one of which is partitioned into two volumes) and four (!) operating systems:
- Volume Wheezer (original 1 GB hard drive): Mac OS 8.6 and a non-functioning installation of Mac OS 9.1.2 {don't try to use this!} (Figure 3)
- Volume Data (20 GB partition on 'new' drive): Mac OS 9.1 and (Figure 4)
- Volume OSX (8 GB partition on 'new' drive): Mac OSX 10.3.9 "Panther" (Figure 5)
- Power on the computer on by pressing the button in the top-right corner of the keyboard (Figure 2). Quickly pressing this button after the computer has booted will bring up a dialog box that will allow you to shut it down.
- The CMOS battery is dead, so when first booted after storage it will default to Mac OS 8.6 on volume Wheezer.
- The computer will think it's August 27, 1956. Reset date and time as follows: Select the Apple menu, then Control Panel, and then Date & Time.
- Keep Magneto 2 plugged in so that the date does not reset for the rest of the week
- Important: If you attempt to boot (incorrectly) from another volume, you can turn the power off for a few minutes and then it will again default to Mac OS 8.6. It's best to plug the computer into a power strip to make it easier to turn off the power.
- A flip-down door is located on the "chin" of the display (Figures 1 and 3), behind which you'll find controls for the brightness, contrast, and speaker volume.
- Note that this display does not have a separate degauss button, as the one on the original Magneto had. This display will auto-degauss when the computer is booted up.
- If you are feeling adventurous, you can try the other OS's. Note that the Mac OS 9.1.2 system on Wheezer does not work, so you will be forced to power down the computer and start over. The process is more complicated than normal because of the OSX installation.
- There are two aliases on the desktop: Startup Disk X and XPostFacto.
- To switch between Mac OS 8.6 (on Wheezer) and Mac OS 9.1 (on Data), use Startup Disk X. Simply select the correct volume and restart.
- If you're daring, you can try the Mac OSX partition. Use XPostFacto (don't use the Startup Disk control panel, or it won't boot properly!), select the radio button to Restart in OSX and choose Restart Now. Note that there is a password for this partition, but Jeff will gladly share it with you if you've made it this far.
- If booted in Mac OSX and you want to switch back to Mac OS 9.1, again use XPostFacto, click the radio button to Restart in Mac OS 9, select the Data volume, and then click Restart Now.
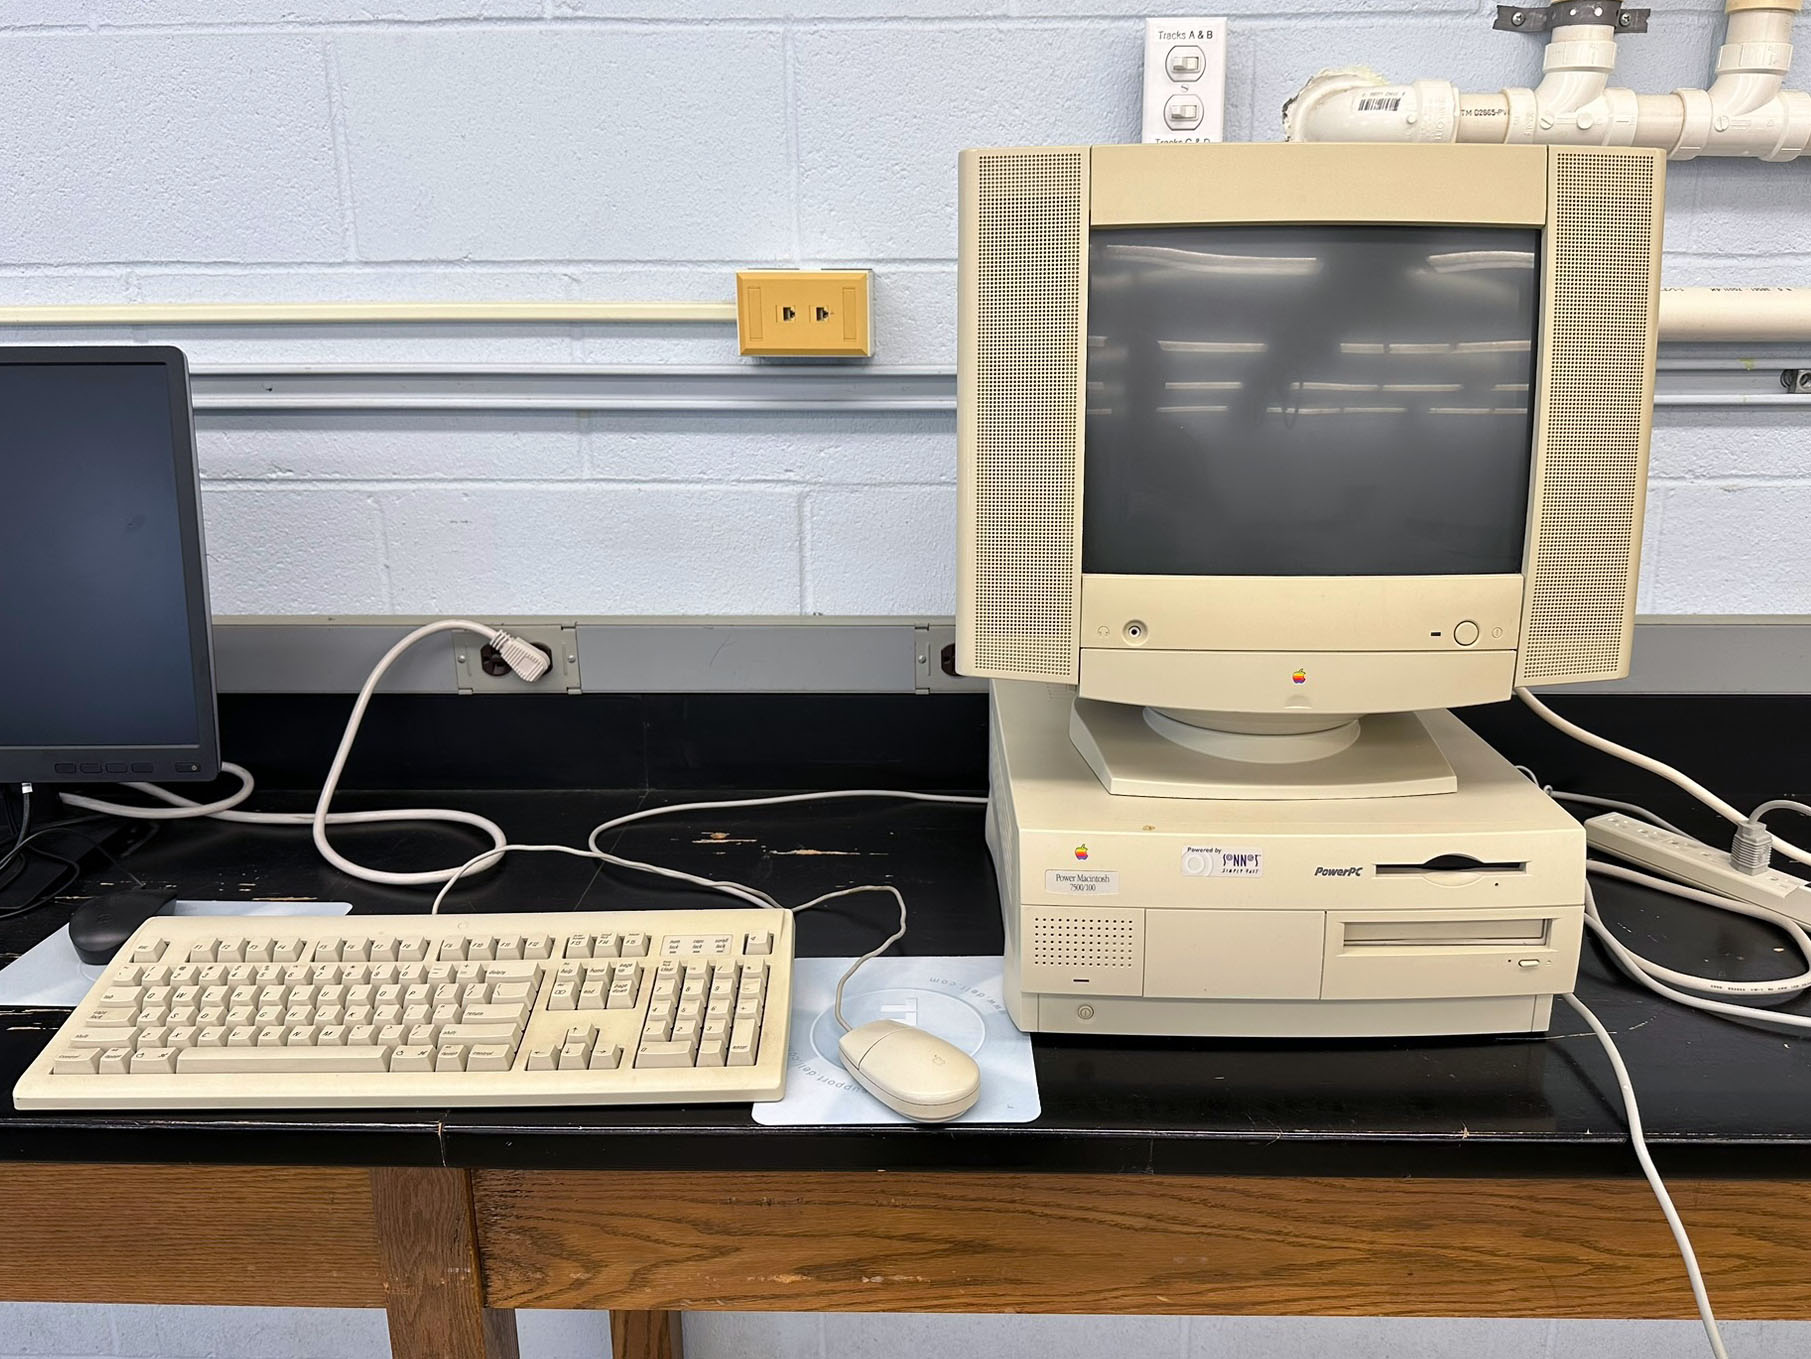
Figure 1: PowerMac 7500 - "Magneto 2" |
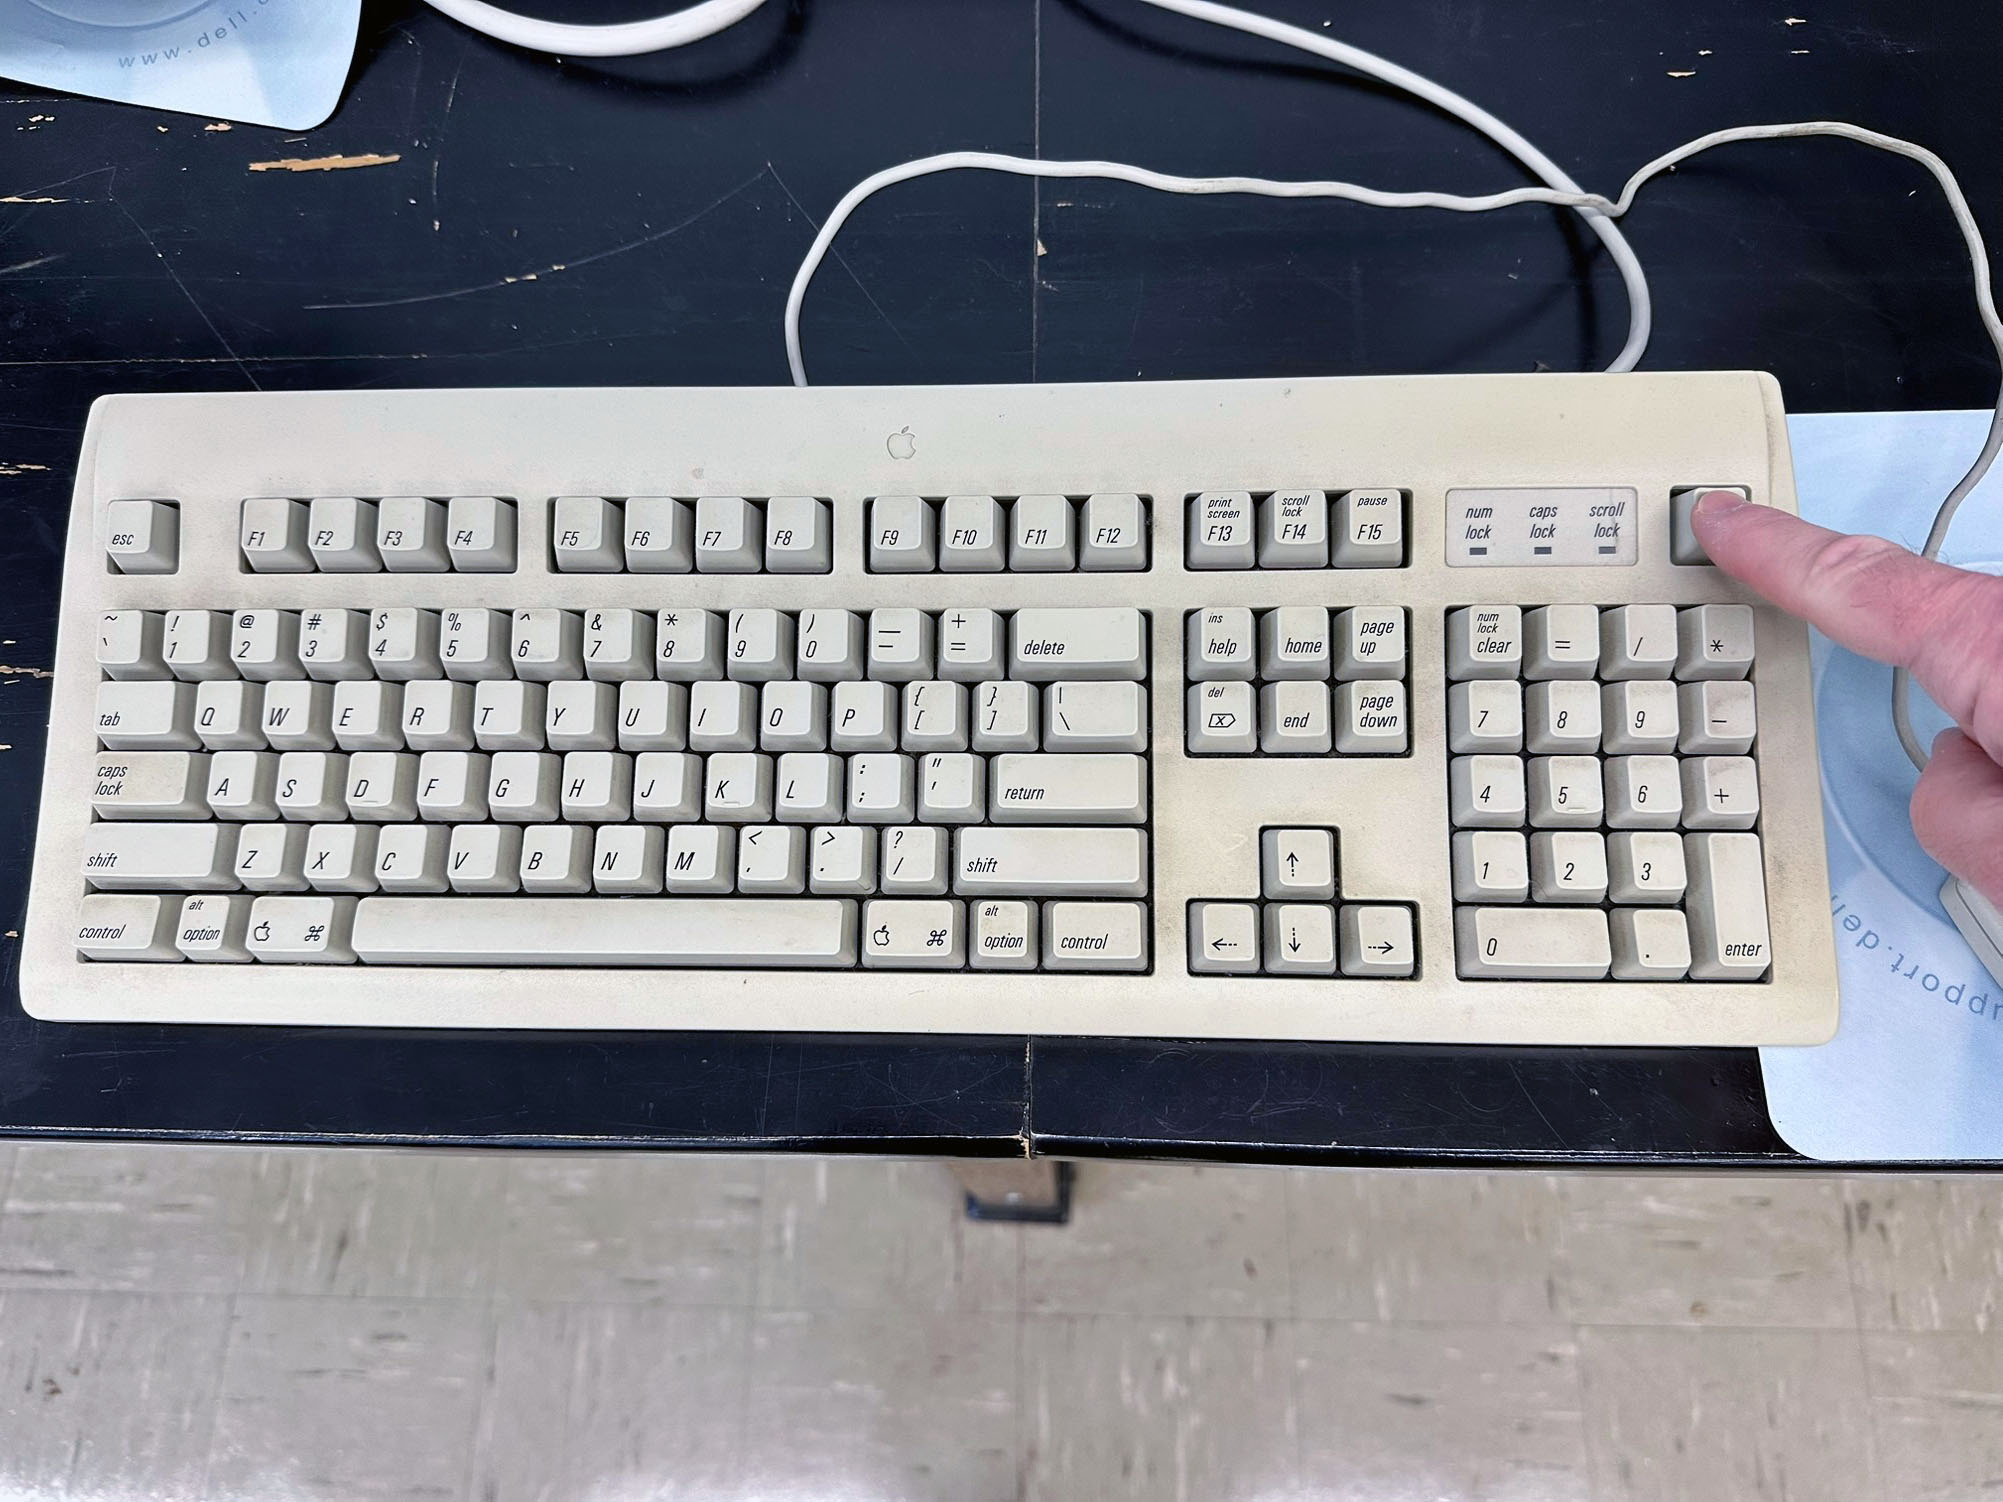
Figure 2: Use the key in the upper right to power on and off |
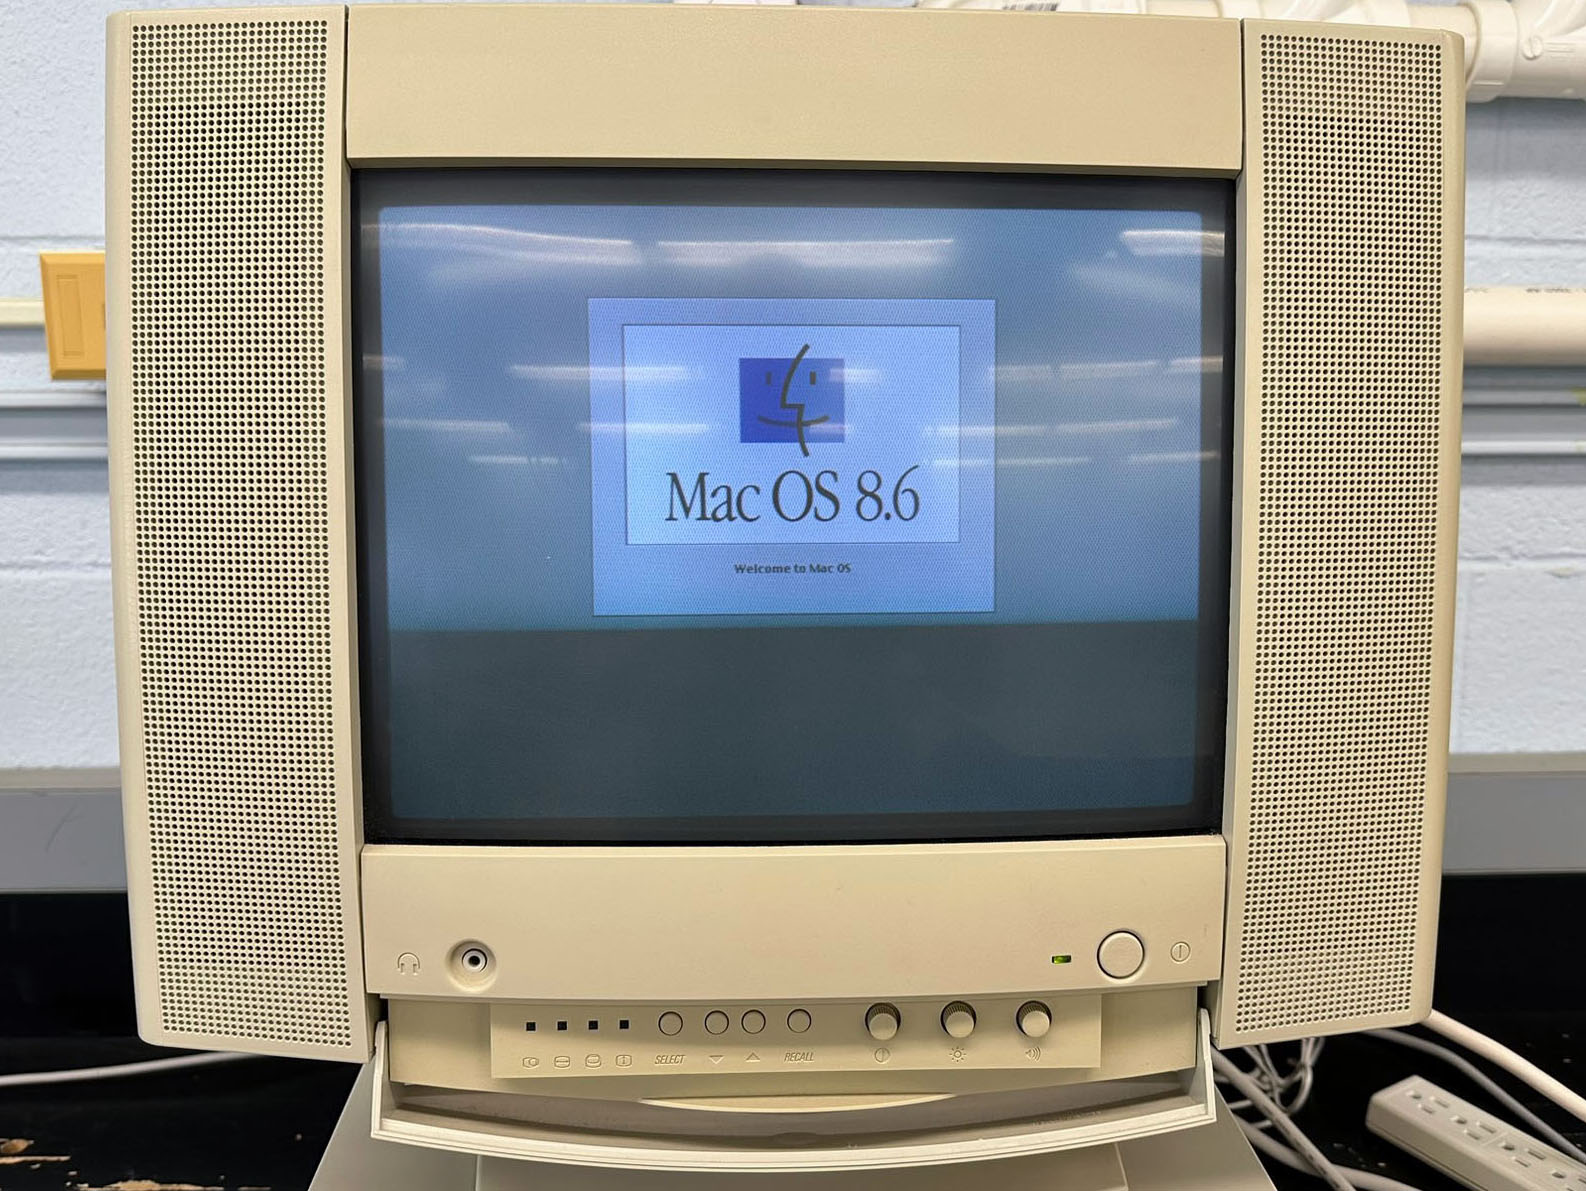
Figure 3: Default OS - Mac OS 8.6.
Note that display controls are behind the flip-down door |
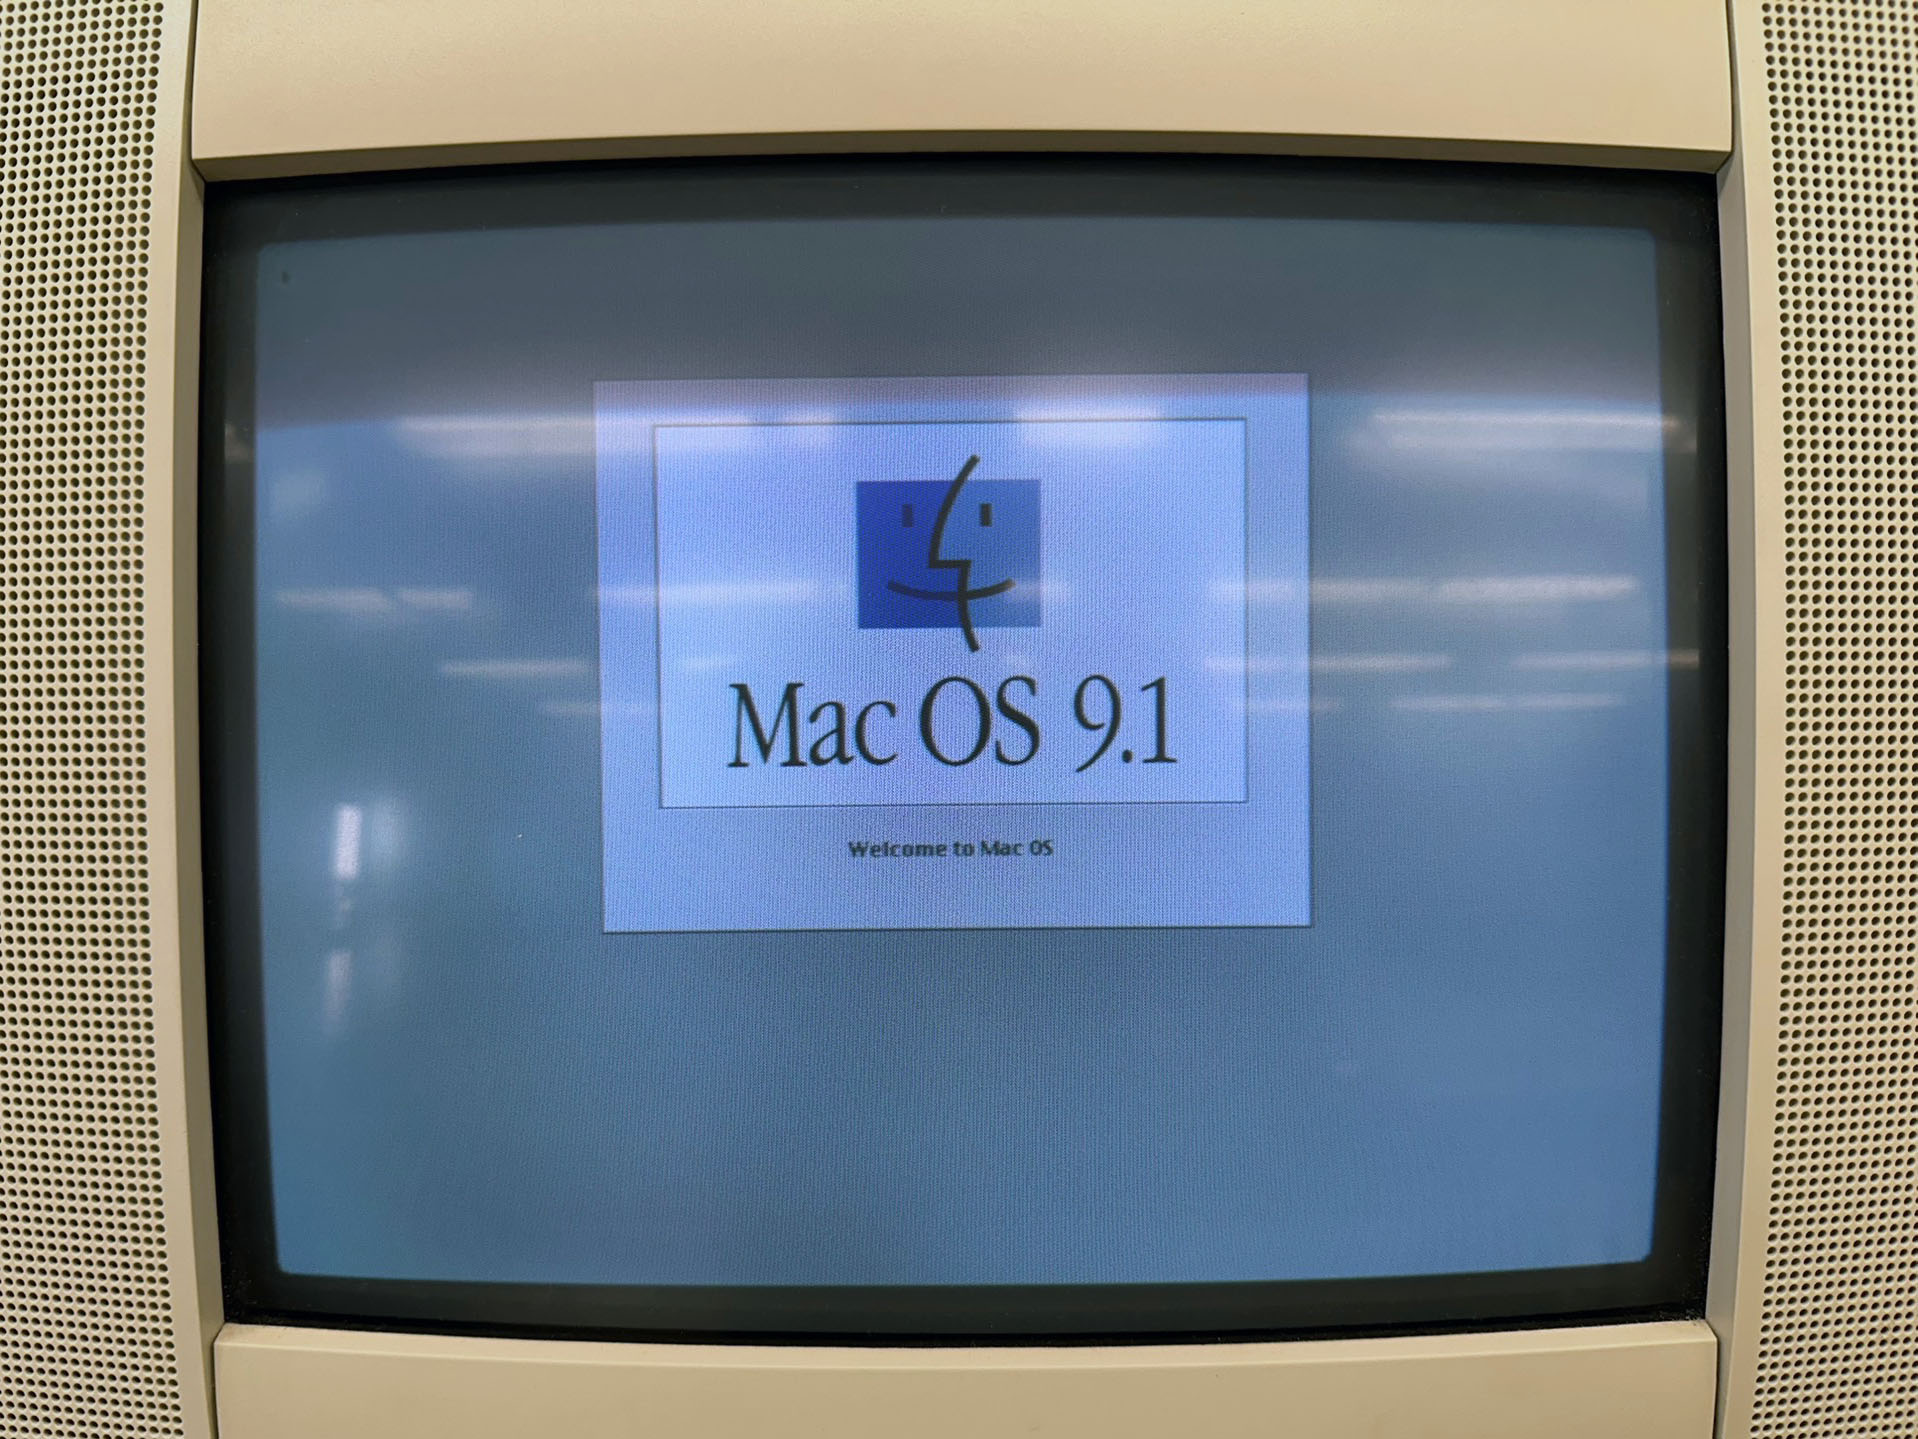
Figure 4: Mac OS 9.1 and 9.1.2 |
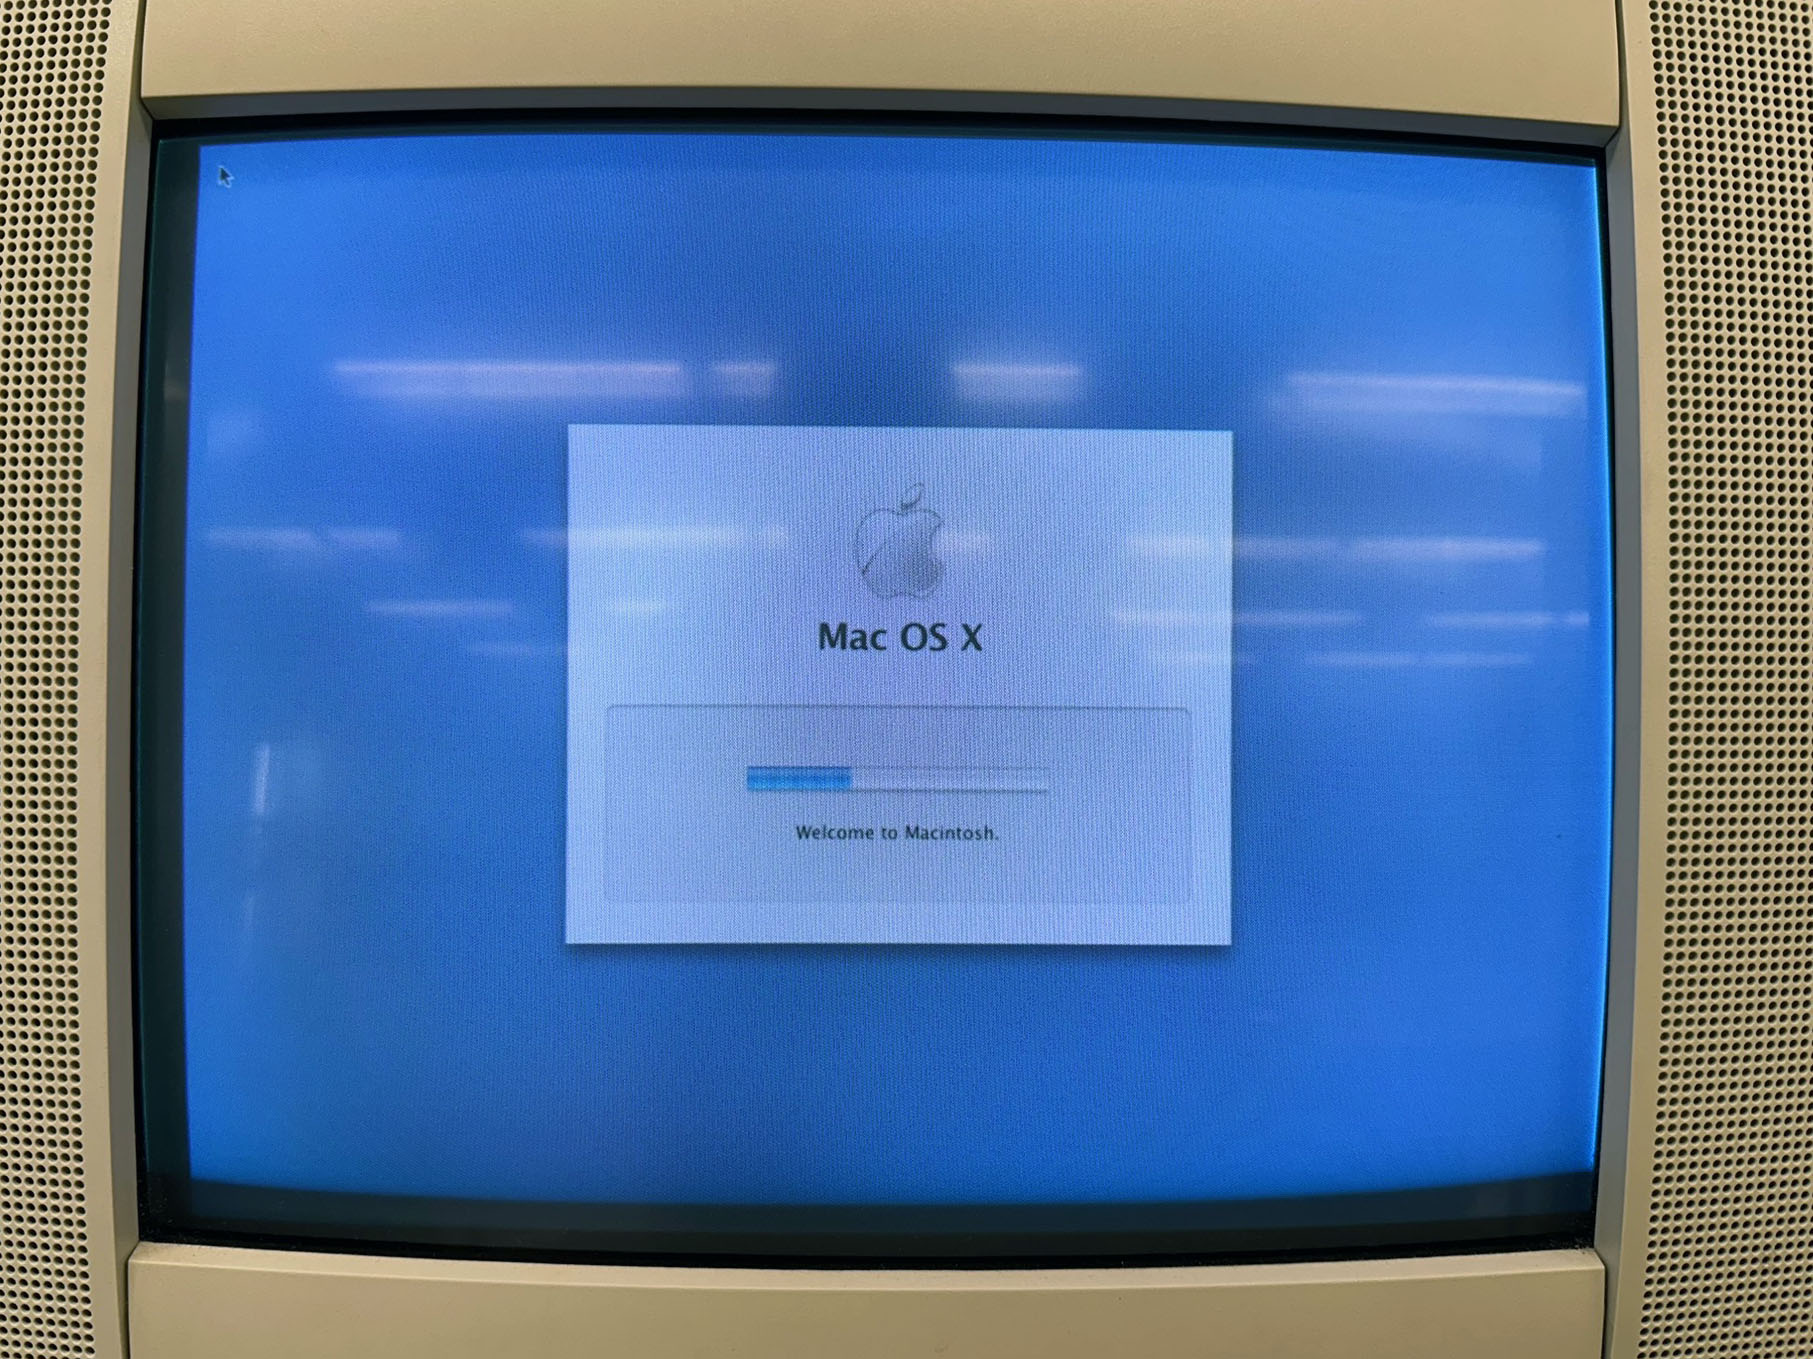
Figure 5: Mac OSX 10.3.9 ("Panther") |
|