CS 140- Lab 1 Instructions
We will do this lab in class on Wednesday Jan 23. Please read the lab before class on Wednesday.
Objectives
- Familiarize yourself with the DrJava interface.
- Experiment with the DrJava interpreter and compiler.
Set Up
Normally I recommend that you work in
pairs, but today I'd like everybody to work by themselves so that each of you sets up and
gets used to the DrJava programming environment.
After today if you do decide to work in pairs you should each still fill out your own lab
sheet to get checked off. Also, you should always take turns driving.
Method
Part I - Copy the Book's Java classes to your P: Drive
In this course we will be using some Java code, that comes with the book, which allows
us to interact with media, such as images, movies, and sound. What you'll
do in this step is to make your own personal copy of these files (you'll be
modifying them as the semester progresses) and you'll inform DrJava where
these extra files can be found. It's not terribly exciting, but important
to get right. Otherwise you won't be able to do any of the fun projects later!
-
First, you'll want to make a copy of the source files from the book to
your own personal shared drive (the "P:" drive).
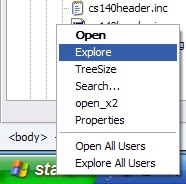
Open up a Windows file explorer by right clicking on the Start button
and selecting "Explore" from the popup window:
-
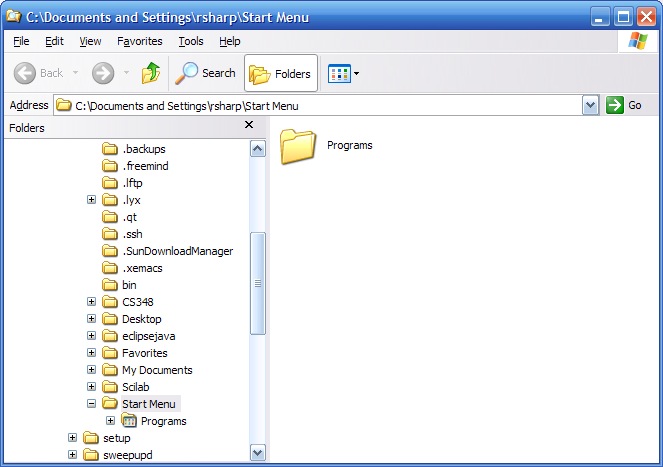
You should now see a window that looks something like this:
-
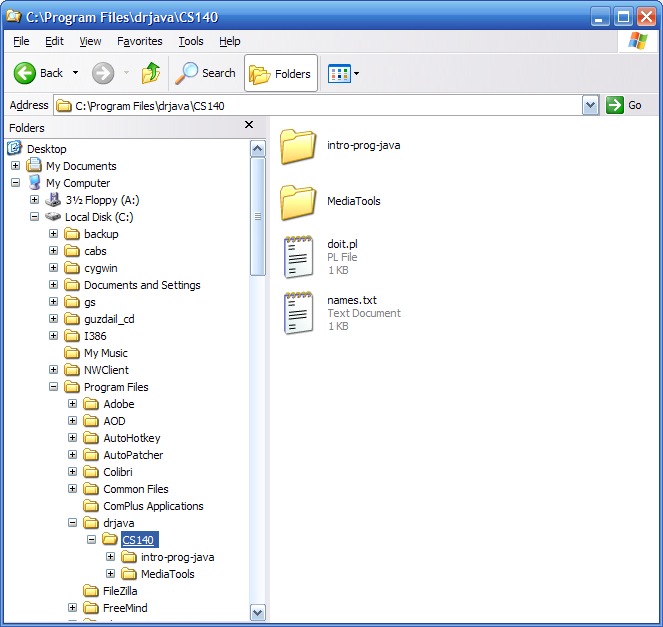
In the left hand pane of this window, scroll down up until you encounter
the C: drive, then navigate to the directory C:\Program Files\drjava\CS140
-
While the CS140 directory is highlighted in the left hand window press:
Ctrl+C to copy the contents of that directory.
-
Now scroll the left hand window down to your P: drive and click on it:

-
While the P: drive is highlighted press Ctrl+V, this will start to copy
all the book's classes to your P: drive. It might take a minute,
so just wait on it.
Part II - Establishing the DrJava Classpath
-
Next you'll be telling DrJava where to find all the extra Java classes
that we'll use in this course.
-
First, start DrJava by going to the Start->All Programs directory and
clicking on the DrJava program. The icon is a small version of this:

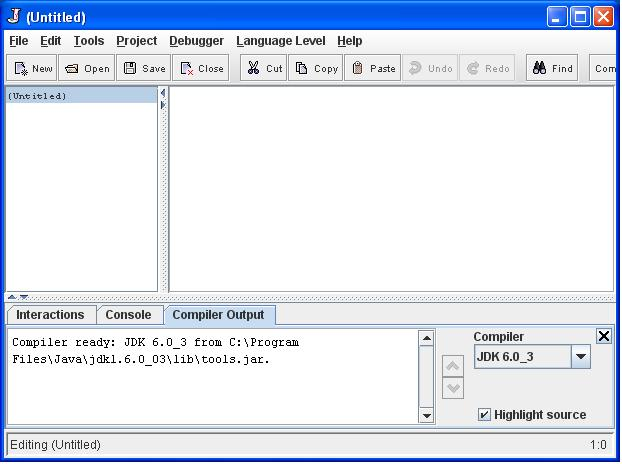
- Next you should see the main DrJava pane which will look something like
this:
-
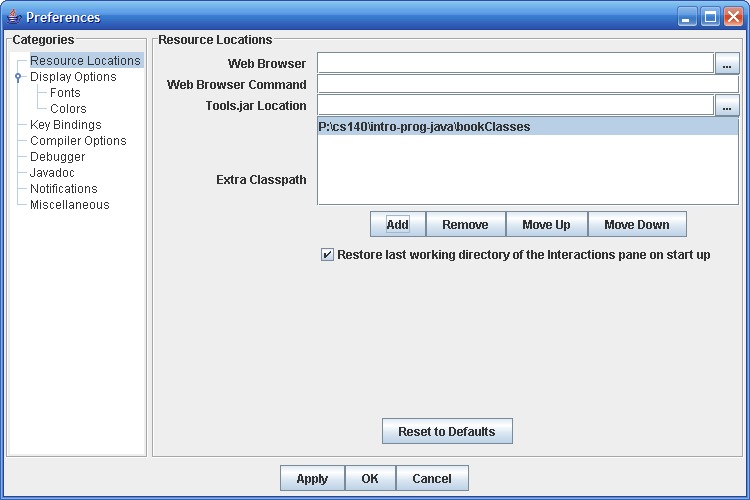
Bring up the preferences window by browsing to the Edit->Preferences
menu. You will see a panel like this:
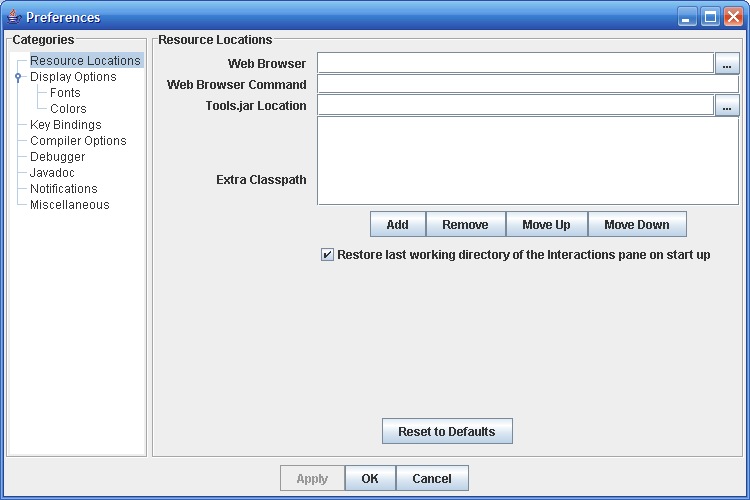
See the "Extra Classpath" box? That's where we will be
adding the location of the extra files which come with the book.
-
Now click on the "Add" button beneath the "Extra Classpath" box.
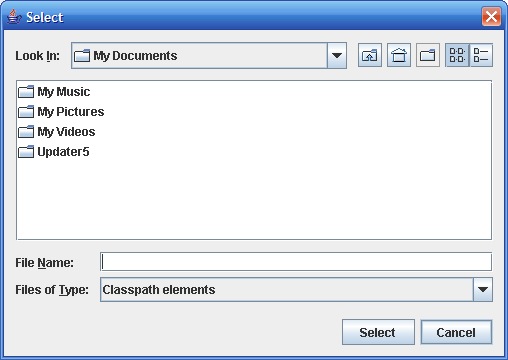
This will bring you to a file selection window that looks like this:
-
Click on the drop down arrow in the "Look In:" box and click
on the P: drive. It will look something like this:
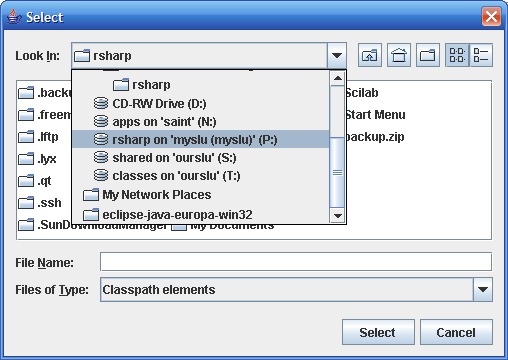
-
Now double click on the following directories to enter them: first "CS140",
then "intro-prog-java".
-
Finally, single click on the "bookClasses"
directory to select it as the path you want to add. If you accidentally
double clicked on the directory, click on the "Up One Level" button
(looks like a folder with an arrow pointing up).
-
Finally, click on the "Select" button. Your preferences
pane should now have an additional path in the classpath and should look
like this:
- Click on "OK"
-
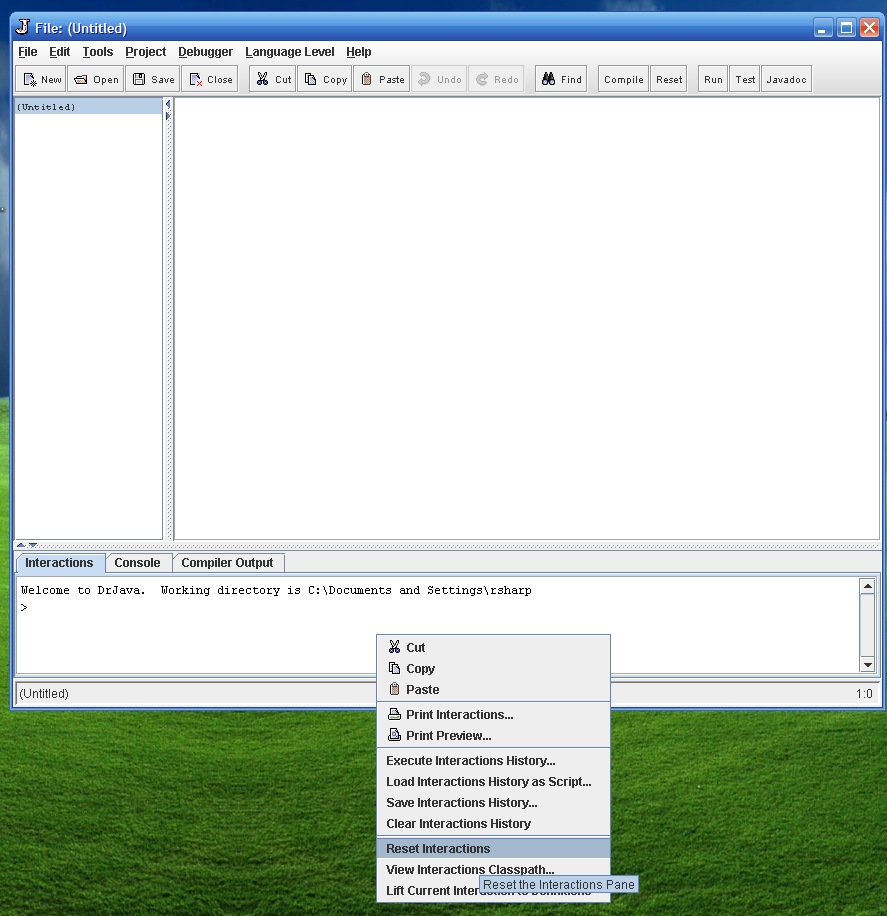
Now you'll run a quick test to make sure the path got added correctly. You
should now be looking at the main DrJava pane again. Right click
on the bottom window that has the label
"Interactions". This will bring up a context menu and you
should click on the "Reset Interactions" option. It will
look something like this:
A dialog box will pop up asking if you're sure. Click on "yes".
-
DrJava should now be aware ofall the new classes we just added to
it. To test this, go to the interactions pane and type the following
command:
new World();
-
A couple of things should happen. The interactions pane should say "A
640 by 480 world with 0 turtles in it." Also, an extra window
should pop up that is blank, but has the title "World" on it. Everything
should look approximately like this:
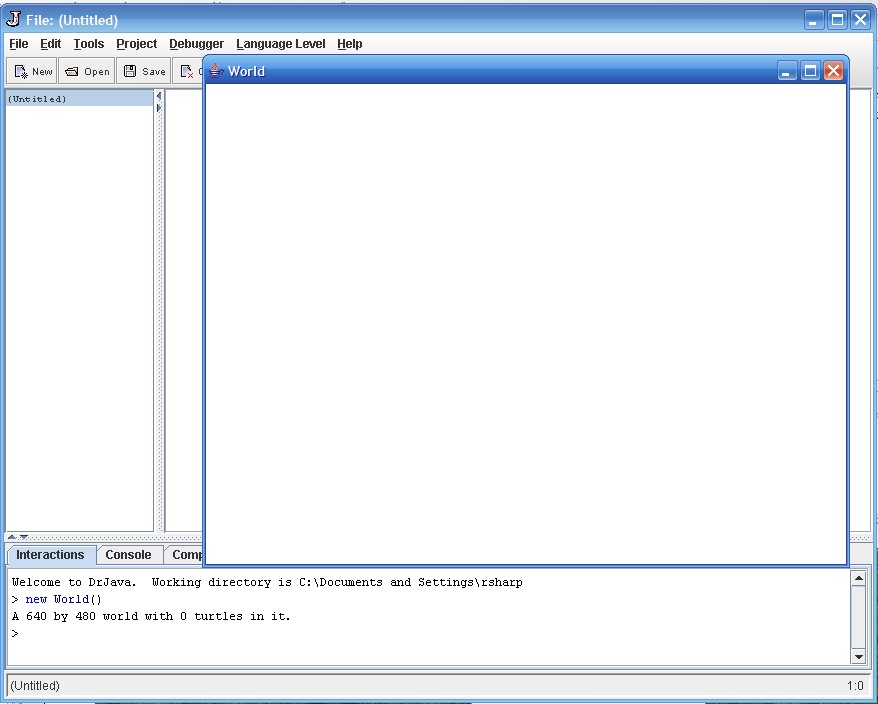 If this happened, then you set up the classpath correctly and will never
have to worry about it again (unless you want to set it up at home too,
in which case you may have a slightly different setup).
Otherwise, if you get an error like "Error: Undefined class
'World'", then something is wrong. Double check to make sure
you added the correct classpath and reset the interactions pane, or ask
your instructor for help.
If this happened, then you set up the classpath correctly and will never
have to worry about it again (unless you want to set it up at home too,
in which case you may have a slightly different setup).
Otherwise, if you get an error like "Error: Undefined class
'World'", then something is wrong. Double check to make sure
you added the correct classpath and reset the interactions pane, or ask
your instructor for help.
-
If you completed this part with a partner, make sure your partner also
has his/her DrJava classpath set correctly before you leave class today.
Part III - Your First Program
Next, you will write your first Java program to familiarize yourself with
the DrJava environment and to reinforce some basic topics learned in class.
-
In the definitions pane (that's the largest window in the DrJava editor)
write the following:
public class OpenLab1
{
public static void main(String[] args)
{
System.out.println("Hello!");
}
}
- Save your Java file (either go to File->Save or press Ctrl+S) name
it OpenLab1, and save
it in your P:\cs140 folder.
Your P: drive is a shared
drive that you can access from any computer on campus.
- Next, click on the "Compile" button on the top DrJava toolbar.
This tells DrJava to translate your Java source code into Java
"bytecode", a form more easily processed by the Java Virtual
Machine.
If it's successful you will see the result "Compilation completed." In
the compiler output window. If not, you will see some errors, which
will be related to mistyping the above code.
Fix it and recompile.
-
If your code did compile successfully, click on the "Run" button
on the DrJava toolbar. You should see in the Interactions pane the
string "Hello!"
-
In the future you can use this class as a skeleton to start all of your
labs. Any code you write in the main procedure will be executed. Now
write some code to answer the following questions:
Question 1: What does the
statement System.out.println("Val:" +
1 + 2 + (3 + 4)); print? What steps does the computer have
to take to create this result?
Question 2: What is the difference
between the statements System.out.println(1/2); and
System.out.println(1.0/2.0); ? Why
do they evaluate to different values? What are the values?
Question 3: Write a program
(add it to the end of your OpenLab1 program
above) to calculate how much money you will make if you work 40 hours at
$13.00/hr and an additional 10 hours at time and a half wage.
Save the code on your screen for your instructor check-off.
Instructor Check-off
When you are satisfied that you have successfully followed the instructions above,
and answered the questions, raise your hand and either the TA or instructor will
check you off.
© Rich Sharp (modified by Ed Harcourt)