CS 140 - Lab, Monday February 4
Objectives
-
Explore various methods to manipulate pictures, pixels and colors.
-
Practice writing some new methods and programs in Java.
-
Learn how to manipulate pixels in an image.
Set Up
-
One or two students should work at one workstation.
-
In one student's account follow the instructions in the
next section. To help choose whose account to use, pick the
student who didn't log in last time. The student who is
logged in is the "driver" while the non-driver should actively help by
observing, making suggestions, and dictating code. You should
trade roles each new open lab session.
Method
Part I - Initial Setup
For this lab you will be writing several methods to extract
color information from Picture
objects. To be able to compare multiple pictures at the same
time, you'll need to make multiple Picture objects
of the same image file so you can view
them simultaneously.
-
Create a complete Java program by copying and pasting the
code below into the definitiosn pane. Make sure to save it.
      public class Lab4 {
        public static void main(String[] args) {

          String fileName = "T:\\Harcourt\\Spring2008\\CS140\\gallery\\bird.jpg";
          Picture originalPicture = new Picture(fileName);
          originalPicture.explore();

          // write the rest of the lab code below this comment

        }
      }
-
Save this class to your
P:\cs140 directory, compile it,
and run it. You should see a picture of a colorful bird
pop up on the screen.
-
For the rest of this lab, whenever you experiment with a method
that modifies the color of a picture, write new code underneath the
comment above to make a new picture object (pick a different name than
originalPicture ). Call the explore
method too. There's an example of what I'm talking about below.
Part II - Extract RGB Channels as Grayscale Images
-
Below is the definition of
extractRedChannel
from the previous homework. (There are multiple solutions,
it's possible that yours looks different but is still correct.)
      public void extractRedChannel() {
        Pixel[] pixelArray = this.getPixels();

        for (Pixel pixelObj : pixelArray) {
          int value = pixelObj.getRed();
          pixelObj.setColor(new Color(value, value, value));
        }
      }
-
If you didn't complete this problem on the homework
assignment, copy this method into your
Picture.java
class and recompile now.
-
Make sure you understand what
extractRedChannel does
and how it works. If you need help, ask your
instructor before continuing.
-
Now, edit your
Lab4 class that you created
above to make an additional picture and
call the extractRedChannel
method above. Add the following lines below the comment line:
      Picture redPicture = new Picture(fileName);
      redPicture.extractRedChannel();
      redPicture.explore();
Recompile, and run your Lab4
class. Two pictures should open, but they may be on top of
each other. After moving them around here's what I see on my
screen (one in color and one in black and white):

-
Question 1: Verify
that the
extractRedChannel
method has transformed the picture as expected by choosing several
pixels in the color image and comparing them with the pixels in the
black and white image. For
example, use the explorer to examine pixel (73,64). What
is the relationship? Is it what you expected?
-
Create two new methods in your
Picture class
nameed extractGreenChannel
and extractBlueChannel
that extract the green and blue channel, respectively. Use the
extractRedChannel method as a guide (that is copy-and-paste :-).
Recompile your Picture class.
-
Add code like you did above in step 4 to create and view
two more pictures
called
greenPicture and
bluePicture . This code goes in your
Lab4 class. Use them to test out your new methods.
-
When you recompile and run your
Lab4
class you should see 4 pictures pop up on the screen. One in
color, and the other three in grayscale representing each of the RGB
channels.
Take some time to look at the differences between the three images.
Question 2: Look
at the red areas in the original pictures, what do these areas look
like in the red channel picture?
Question 3:
Similarly, what do the the green and blue channels look like as
compared to areas of high green and blue in the original color picture?
Part III - Extract RGB channels as color images
The previous color extractions worked by setting all
the RGB components to the same value as whatever color we were
interested in. For example, if we encountered a pixel with
colors (r=38,b=129,g=92), we would reset all the colors in the pixel to
be equal to 38 thus indicating the overall level of red in the image
(r=38,g=38,b=38).
-
This idea is slightly confusing since the resulting image
is not actually red, but gray.
-
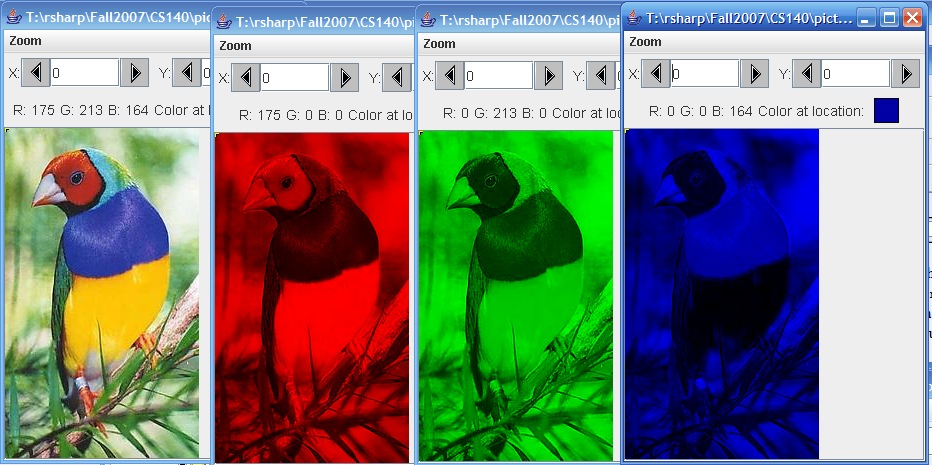
In this section you will copy and paste the methods you
created above, but rename the copies
extractRedChannelRed ,
extractGreenChannelGreen ,
and extractBlueChannelBlue .
These will extract the R, G, or B, channel and display the
resulting channel in that color. So rather than seeing a
grayscale image, you'll see the actual colors they're supposed to
represent. Here are the results I got once I created all
three methods (you may have to go to this document online to see the colors)
-
Figure out how to modify the bodies of these methods so
that rather than creating a gray color, they create the color of the
channel you want to see. Hint:
in your previous methods you extracted the value you were interested
in and set the other two channels to the same
value. This time you will do something different with the
other two channels. Think about it and ask your instructor if you still can't
figure it out.
-
Once you've got all 6 methods written, edit your main
Java class so that it opens 7 pictures:
- One should be the original file
-
Three should be the respective RGB channels extracted
into grayscale.
-
The last three should be the respective RGB channels
extracted into their own color channels.
To get checked off for this lab, arrange all 7 images on your screen so
that you know which one is which and show your instructor.
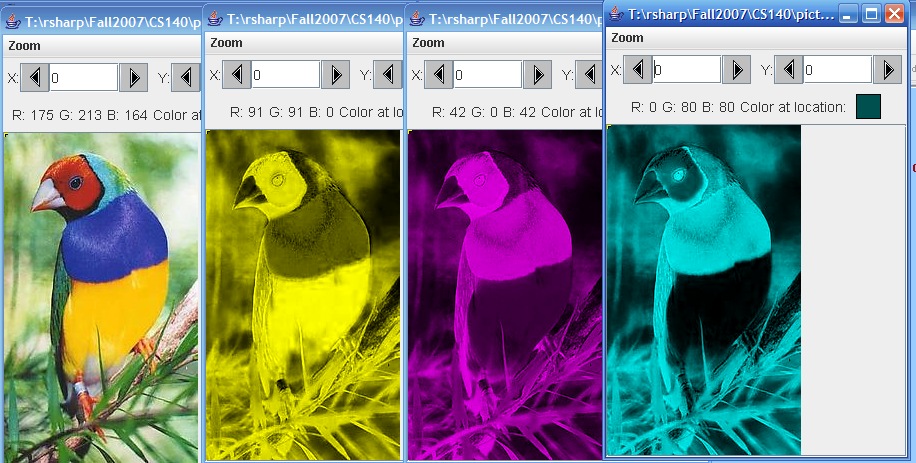
Extra Credit - Extract CMY color information
-
It's easy to extract RGB information because the colors
are directly included in one channel. Extracting the CMY
information is slightly harder, but results in cool images.
-
First note that blue is the complementary color of yellow
yellow (255,255,0) + blue (0,0,255) =
white (0,0,0). So the yellow in a picture can be
retrieved by just subtracting out whatever blue wasn't used.
-
To extract the yellow component take a full component
of blue (255) and subtract the current value of blue but place it in
the R and G components (R and G together makes yellow). For example, if your
color is (48,253,80), you would extract the yellow component as:
- (255-80, 255-80, 0) = (175, 175, 0)
Notice that the R and G values were irrelevant in the yellow
calculation. Formally, you can think of this calculation as:
- Yellow color of a pixel = (255 - blue, 255 - blue, 0)
-
The magenta and cyan components use the same method
except the contributions are different:
- Cyan color of a pixel = (0, 255 - red, 255 - red)
- Magenta color of a pixel = (255 - green, 0, 255 - green)
-
To complete this extra credit assignment, create three methods
which extract the CMY channels similarly to your RGB methods in part
III above. You should end up with images that look like this: