- Computers are needed for lab this week
- Measure the acceleration of a cart down an inclined track
- ½ of the tracks are "heavy", in which the cart has an extra 500-g mass (nearly double mass of cart alone) attached. The other ½ are "light", with just the cart alone
- I find that I spend a lot of time watching students and talking with them, making sure their technique is correct, they're plotting their points as collected, writing ao on the board as soon as their graph is completed, understanding what's happening and what's affecting results, etc. This is not a good lab to get your grading done
- I use my iPhone to set all tracks so that they are at the same angle (3°); this isn't trivial, so the angle error can be off by a couple tenths of a degree. Since acceleration is independent of mass, all carts should accelerate at the same rate. The length of the track is 121.8 cm.
- Expected acceleration (assume θ = 3°): ax = g⋅sinθ = 51.3 cm/s
- Pre-lab notes:

- You will have graded their first lab journals from last week. If you have done your job and been picky while grading their journals, you can expect them to be a bit slow this week, worried about the format of their journal (and not the physics). It would behoove you to tell students that they shouldn't keep asking you "Is this what you want?"; they have been provided with all the materials and guidance needed to write their journals. Most 103 students will figure this out quickly; a few never figure it out
- Students are not familiar with the notation <t> meaning the average time. They would be so enlightened if they read the directions carefully.
- This is the first time they use a photogate, so take a moment to demo its use in today's experiment. You might also want to briefly mention the different modes available
- Photogate Note! Only 3rd generation photogates (marked on back 3A, 3B, etc.) are used, NOT 4th/5th generation (4A, 4B, …, 5A, 5B, …). The 3rd gen photogates allow you to press and hold the Start button, and the timer begins when the button is released; this is much better for starting the timer when the cart is released. The timer starts on the
4th/5th gen
photogates as soon as the Start button is pressed, so will introduce timing errors
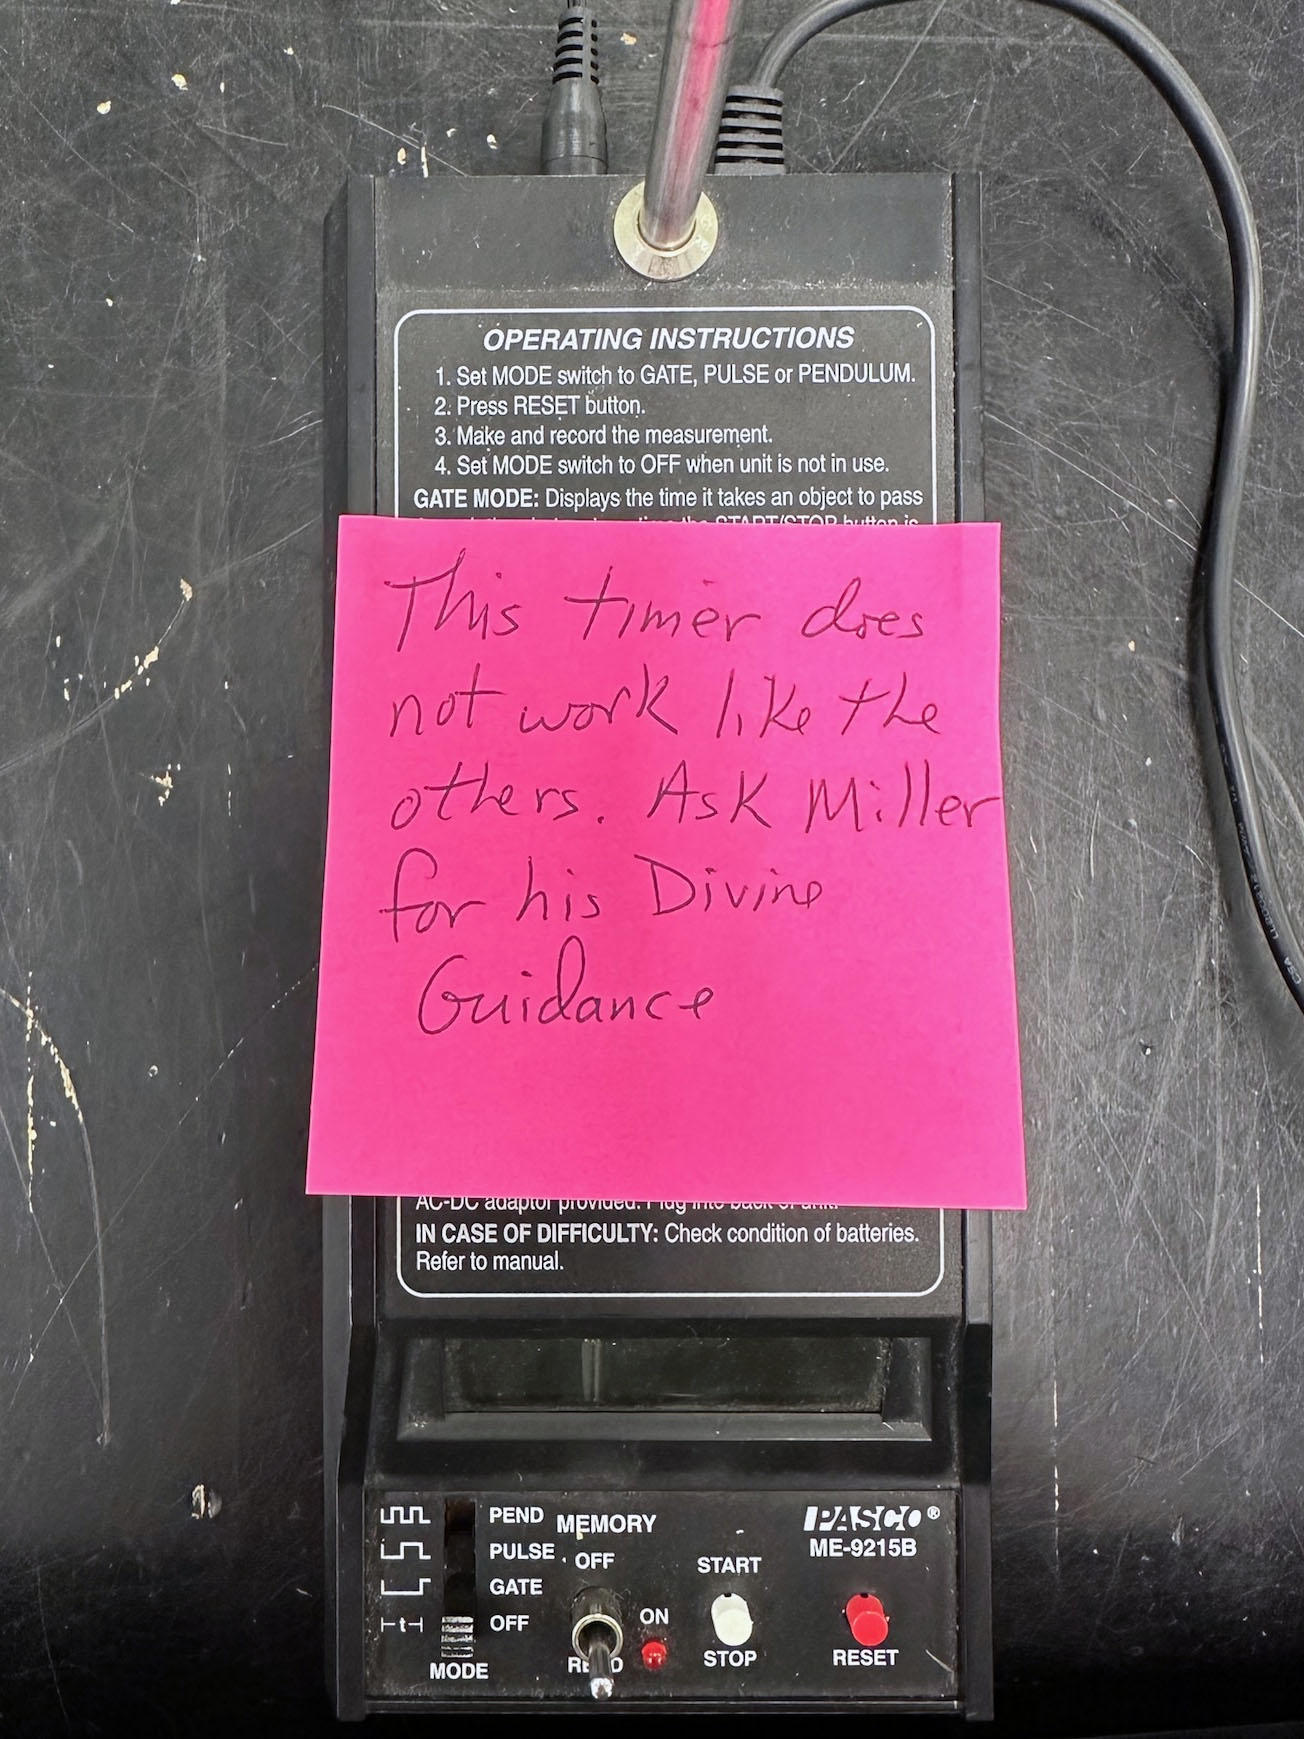
- Note from 2021: Two of the 3rd gen photogates bit the dust, so I had to replace them with 4th gen timers. As of Fall 2024, seven 3rd gen photogates remain. The results using 4th gen timers were ok, but that just makes it more confusing. If a 4th gen timer is used, place an appropriate sticky note on it, as shown at right
- The cart flags are made of thin plastic. Encourage students to be carefully not to drop the carts which will surely break the flag
- Assorted Problems: A compendium of issues encountered this week:
- Rounding photogate measurement. Even though it's in the instructions, students want to round off the measurements they read from the timer. Make sure they record all the digits that are displayed
- Students think the photogate is in the wrong position. The photogates are set so that they are tripped by the flag on the cart when the front of the cart reaches the 110.0 cm mark. Since the flag is not at the leading edge of the cart, the photogates actual position is around the 108 cm mark of the track. Do not move the photogates, and make sure the students don't move the photogates! Explain this to them if they ask, but you'll mostly get blank stares. Their brains are not wired for this kind of abstract thinking
- Students want to use -g to calculate the expected acceleration
- Student errors in measurement of angle
 Yeah, they can't measure correctly. The track length is 121.8 cm; it is best measured with a tape measure on the side of the track opposite the attached ruler, since there are no clamps in the way there. And the height, 'h' is measured to the bottom of the track; many will measure to the top of the track, adding an additional 2 cm Yeah, they can't measure correctly. The track length is 121.8 cm; it is best measured with a tape measure on the side of the track opposite the attached ruler, since there are no clamps in the way there. And the height, 'h' is measured to the bottom of the track; many will measure to the top of the track, adding an additional 2 cm- Also, their calculators should be in degrees mode, not radians. A note has been added to the lab instructions, but that doesn't mean they still won't do it
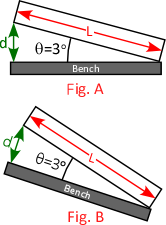
- (Note: the benches were leveled during Summer 2019, which has dramatically improved results!) The benches are not level, so the angle students measure may not be the true angle
- Example: if the angle measured is 3° (Fig. A, right), but the bench is tilted at 30° (Fig. B) the true angle of the track could be anywhere from 27° to 33°!
- You might be able to demonstrate this by placing the student's cart on the lab bench. It will probably roll, but if the bench is rough and dented, the cart won't move much at all.
- You can also demonstrate this using an old inclined plane (non-Major's stockroom, shelf R1) to mimic Figures A and B. I'll try to remember to put one in the lab for a demo
- Students want to lay out their data table before they do the experiment, which means they don't leave room to record multiple measurements of time for each distance
- Mechanical dexterity: Some have problems getting the cart wheels into the grooves on the track. If their cart bounces around the track at the end of the run, they're likely doing it wrong!
- Finally, make sure students don't lean on the tracks! It takes me a while to get the angles of each track approximately the same
- I usually have a class discussion when all (most?) of the groups have written their accelerations on the board, trying to lead them to the realization that a significant problem can be the uncertainty of the track angle. I try to get students to write their accelerations on the board as soon as they put a curve fit on their Excel graph.
- If you have a small lab section (<4 groups), it helps to fill in the acceleration table on the board with previous day's results
- Historical Note – Major Problem with Track Angle: During Monday lab on 15 Sept., 2015, the data was widely scattered amongst heavy and light carts, and the heavy carts showed the greatest acceleration (see data below - note that all angle measurements show good agreement). While some of this can be attributed to crappy student data, the bulk of the problem is from the benches not being level. So, even though I carefully set the height of all the tracks to the same length, the actual angles are very different.
- Solution: For the next lab on 16 Sept., 2015, I first calibrated a bubble level app on my iPhone to the lab sink (which itself is not level – aarrgghh!!), then set all the tracks to an angle of 3.0° according to the iPhone. The results showed a marked improvement (below - note that the angle measure varies quite a bit, but there is much better agreement for ao). This will be the procedure used to adjust the angle of the tracks in the future
- During the Monday lab on 12 Sept., 2016, it was noticed in the Monday section that two tracks with heavy carts had a measured acceleration greater than the other carts. Solution: I switched heavy and light carts on those tracks. Data appears below
- Student data (2015 & 2016) showing difference in track angle adjustment methods (track angle, and ao in cm/s2):
| |
A - Light |
B - Heavy |
C - Light |
D - Heavy |
E - Light |
F - Heavy |
G - Light |
H - Heavy |
| M - 15 Sept, 2015 |
2.9° |
|
2.8° |
2.9° |
|
2.9° |
|
2.9° |
| (set h = 6.0 cm) |
42.0 |
|
48.1 |
36.2 |
|
56.9 |
|
56.6 |
|
| W - 19 Sept, 2015 |
3.0° |
2.6° |
2.6° |
3.4° |
3.1° |
2.3° |
2.6° |
2.2° |
| (set θ = 3.0°) |
42.2 |
44.8 |
45.9 |
45.8 |
46.5 |
48.1 |
44.5 |
49.5 |
|
| |
A - Light |
B - Heavy |
C - Heavy |
D - Light |
E - Heavy |
F - Light |
G - Light |
H - Heavy |
| W - 14 Sept, 2016 |
40.5 |
42.4 |
40.5 |
43.1 |
42.6 |
41.0 |
40.8 |
43.0 |
|
 Yeah, they can't measure correctly. The track length is 121.8 cm; it is best measured with a tape measure on the side of the track opposite the attached ruler, since there are no clamps in the way there. And the height, 'h' is measured to the bottom of the track; many will measure to the top of the track, adding an additional 2 cm