Room setup
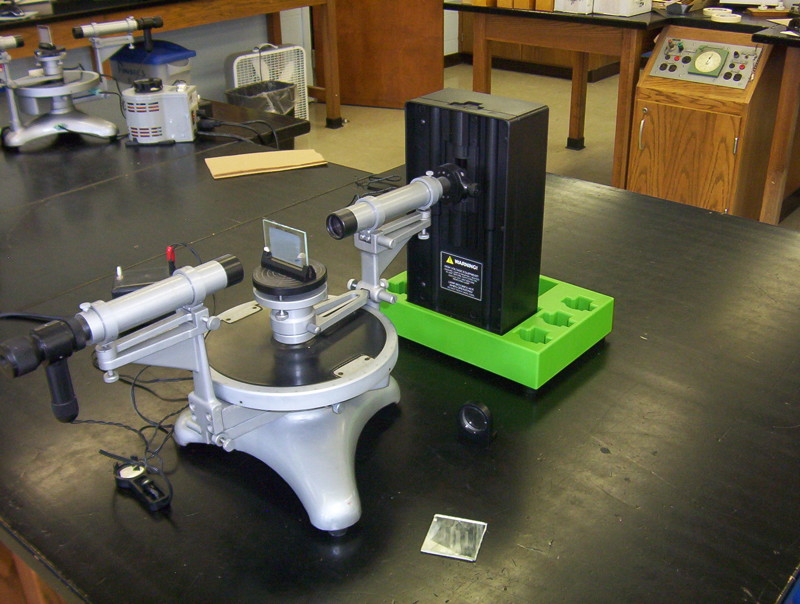
Note how spectrometers are arranged near edge of bench

Stuff needed: gas tube power supply (with
H tube), mirror, Spectrometer with diffraction grating,
transformer with illuminated magnifying lens

Gas tube power supply, shown with
H tube. Black portion is elevated to match spectrometer height

New gratings & custom made brass base - 2019.
The label is on the grating side

Tools needed to tighten grating in holder:
Small crescent wrench, 3/32" allen wrench

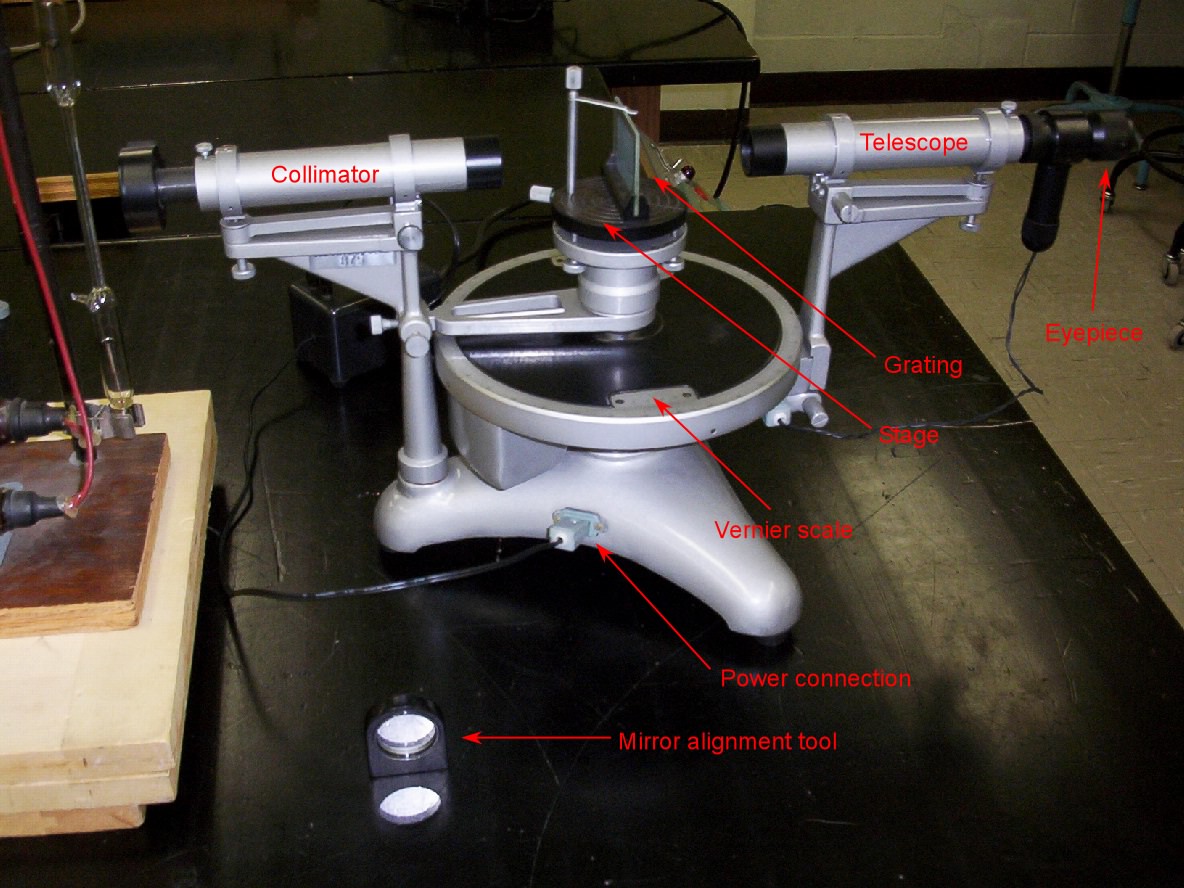
Annotated version of the spectrometer.
This is an old photo - note the H-tube power supply at left!

Put grating in its base; place on stage
Note that the label (grating) side faces the H-tube!

The grating in its base on the stage.
The label faces the H-tube

Detail showing grating on stage
All spectrometers are labeled A through H. Place them on the benches
according to the map on the setup page. Spectrometers E and F are also
labeled 2008. Parts need to be matched for these two spectrometers

Match spectrometers E and F with the corresponding 2008-labeled
grating, grating holder & power supply. A variac is needed for the 2008
models, since the illuminated reticle is very bright

Transformer with illuminated magnifying lens

Plug transformer into side of spectrometer

Place boxes of parts on front bench.
Flashlights are left over from last week's lab

Box O'spectrometer parts. The gratings are
stored in the ugly green boxes (lower left)
Two lasers will be placed on the movable table.
Wood platforms elevate one laser so the patterns don't overlap
Lasers can't be too far away from the wall,
or they'll encounter interference from the tube power supply
or spectrometer
If 7 or fewer spectrometers are set up, then the laser can be
placed on the central portion of the lab bench