- Computers are NOT needed for lab this week
- The rubber rod will gain a net negative charge when using the rabbit fur; the glass rod will gain a net positive charge when using paper towels. Vigorous rubbing and a dry paper towel is needed to get a good charge on the glass rod.
- It can be difficult to get a good charge on the glass rod if the humidity level is high. I frequently have to charge the glass rod for students.
- An old oscilloscope is used to determine the polarity of a charged rod. Instructions for turning on and operating the oscilloscope are at the end of these instructions.
- Students usually need guidance with using the oscilloscope, which has been set to project a single 'spot'. Charge each rod, and move the side of the rod (not the point) up and down, parallel to oscilloscope face. Occasionally wipe the side of your hand across the glass scope face to discharge it. This can be more difficult to do with the glass rod; extremely vigorous rubbing is needed to get a good charge.
- If possible, talk students through examining the water stream. Have them use the rubber rod first (keep the rod dry!) After seeing the behavior of the water stream, ask them what they think will happen with the glass rod; about half will erroneously guess that the stream bends in the opposite direction. When they see that they're wrong, ask them what they know about water molecules; most will know that they're polar
- Separating charge on the metal spheres is also very difficult if it is very humid. During the Spring 2024 semester, the humidity level ranged from 80% to 90%. I found that only the large copper spheres worked reliably; the smaller chrome spheres had a weaker charge separation. We only have three pairs of large copper spheres, so those can be shared for this part of the lab.
- I usually walk students through a demonstration of the hollow sphere demo, which can be done with several groups at a time; here's the procedure:
- Make sure you have a charged electroscope ready to show where the hollow sphere holds its charge
- Push the small spheres together to discharge the electrostatic generator
- Make sure the small carbon-coated Styrofoam ball is resting on the surface of the large hollow sphere with insulated rubber base
- Show that the generator is unplugged, and that you'll be turning it by hand (in direction of arrow drawn on apparatus near the pulley.) Show them that there are small rubber 'fingers' on the interior of the generator's plates that will rub along the 'Gatling gun' structure, transferring charge from one side to the other of the generator
- With the small spheres still touching, slowly rotate the generator pulley, to show them that nothing happens
- Pull apart the small spheres to their maximum separation, and again slowly rotate the generator pulley. You'll hear a lot of static, and the Styrofoam ball will move away from the large hollow sphere as it is charged. If you continue to rotate the generator, it will eventually discharge and the Styrofoam ball will contact the hollow sphere
- Stop rotating the pulley when the Styrofoam ball is separated from the hollow sphere, showing that the sphere is now charged. Carefully move the Styrofoam ball away from the sphere, ensuring that you don't discharge the sphere (slide the rod & base away)
- Take a small metal disc with insulated handle, rub your fingers on the disc to discharge it, then wave the disc up and down above the electroscope. The leaves won't move, or if they do move it will be very slightly due to induction
- Rub the metal disc on the outer surface of the charged metal sphere. Again wave the disc above the electroscope - the leaves will move noticeably. The outer surface of the sphere has a charge!
- Note that most of the time, the outside of the sphere gets a negative charge, but sometimes it gets a positive charge, as noted from the reaction of the negatively-charged electroscope. I haven't figured out why this happens
- Discharge the disc, carefully dip it into the hollow sphere (don't discharge the sphere with your fingers or you'll have to start over; tell students that it's just like playing the old game "Operation"), and audibly scrape the inside of the sphere with the disc. If there's charge on the inside of the sphere, the disc should now be charged
- Carefully remove the disc, and wave it above the electroscope. There should be no (or very little) movement of the leaves. No charge on the inside!
- Demonstrate that you haven't discharged the sphere by repeating the test on the outer surface: ground the disc, rub on outside of sphere, test on electroscope. The leaves move!
- Show students why the power company tells you not to get out of your car if there's a live electrical line lying across your hood: stick your finger in the hole of the hollow sphere, and there will be a small discharge from the edge of the hole to your finger
- You can rotate the generator pulley while holding your finger near the sphere to show the spark
- Also show them that the sphere won't charge if you hold the wire connecting the sphere to the generator, so static charge doesn't necessarily remain confined to the conducting wire that makes this connection
- Be sure to push the small spheres together to have apparatus ready for next group
- Oscilloscope configuration and operation:
- We currently use a Tektronix 502A Dual Beam Oscilloscope, manufactured between 1963 and 1971. It takes a few moments to be usable, so I usually turn it on when I get into the lab, as follows (numbers correspond to the image in Figure 3 below):
- Plug in the oscilloscope. I don't trust it enough to leave it plugged in all the time
- The plastic grid scale should have previously been removed from the scope face during set up (Figure 2). If not, remove the four ring nuts by hand (Figure 1), remove the metal faceplate and plastic grid and set aside
- Turn the Power and Scale Illum (1) dial fully clockwise (Figure 3)
- Set the Intensity (2) knob around 8. It can be turned up a bit if the spot is too faint, but it shouldn't be so bright that its image is distorted
- Wait several minutes for the tubes to warm up. Now is a good time for your pre-lab schpiel
- If the spot is not visible, first try turning the Intensity (2) up a little. If that doesn't help, press and hold each Finder button in turn (one is located in the Upper Beam (3) section of the oscilloscope, the other in the Lower Beam (4) section).
- Turn the Position knobs in either the Upper Beam (5) or Lower Beam (6) section to center the spot on the scope face
- When the last group has finished, you can turn off the oscilloscope by turning the Power and Scale Illum (1) knob counterclockwise (it will click into place when fully off)
- Unplug the power cord. No point risking a fire
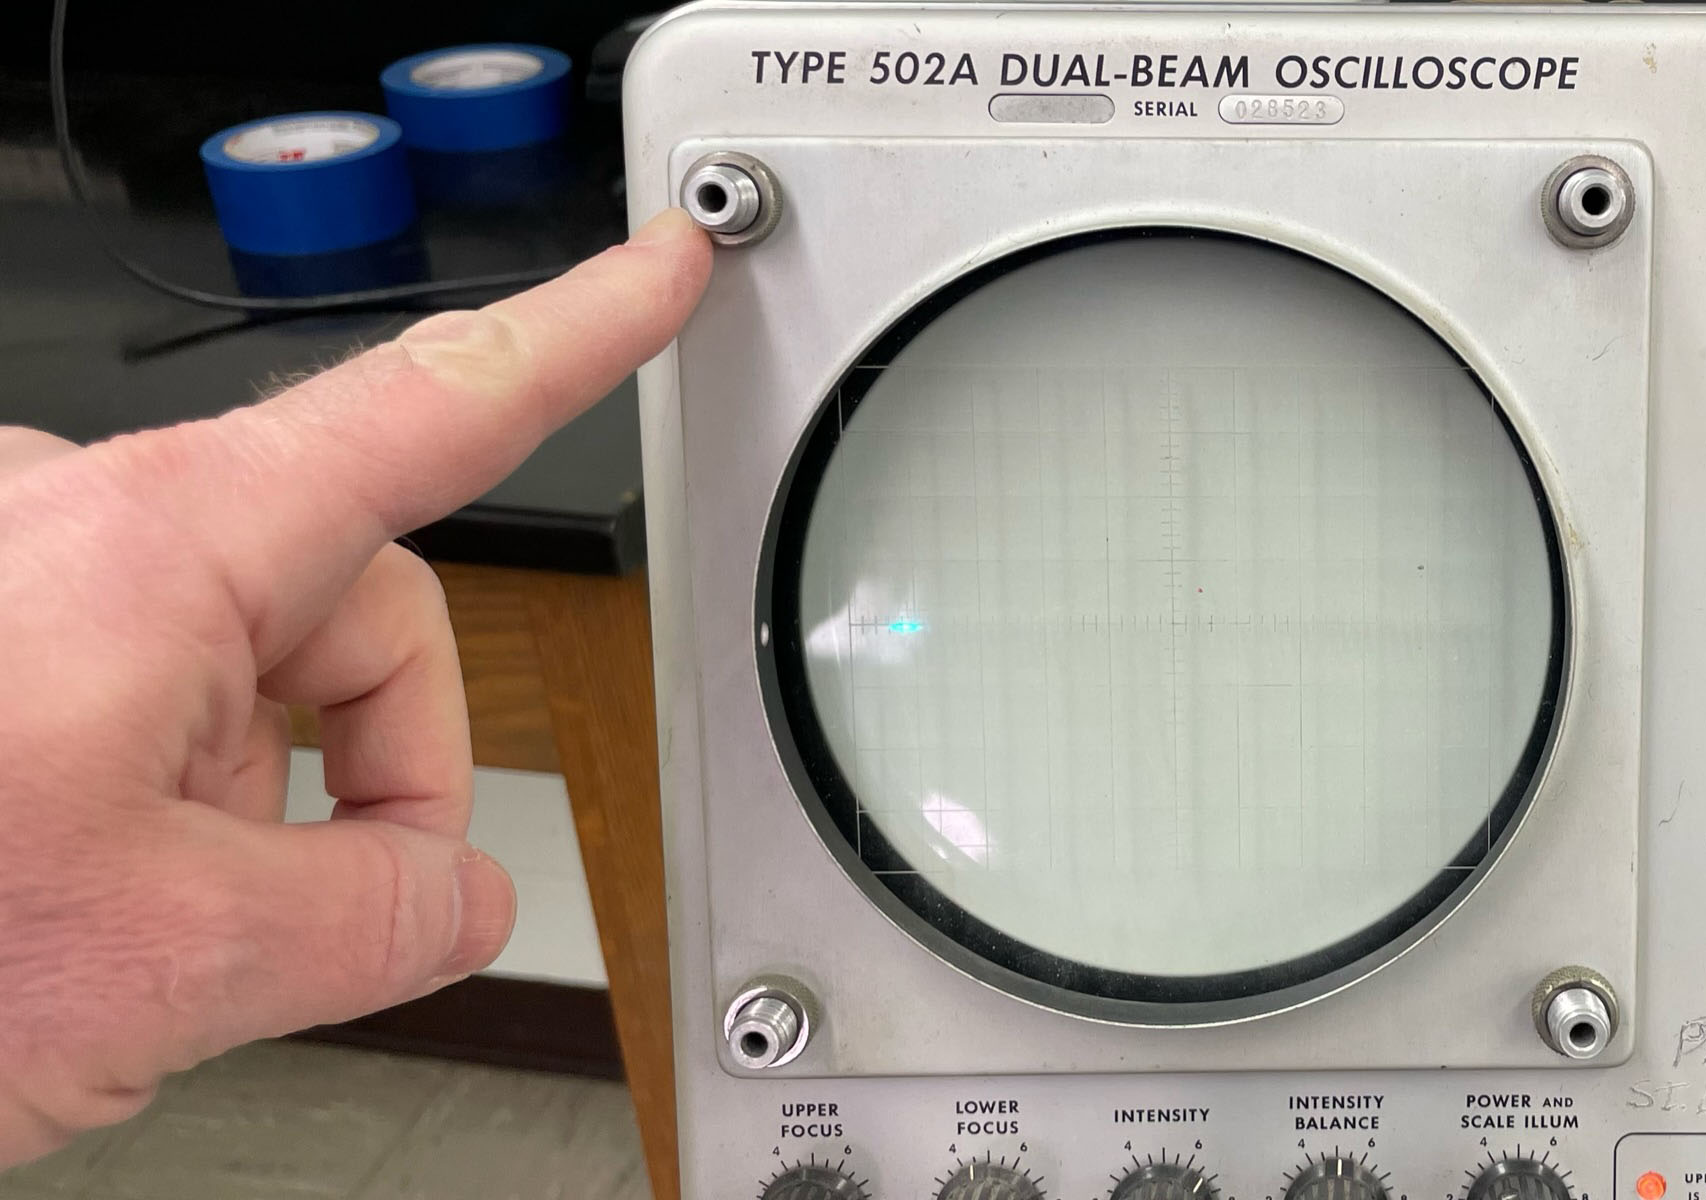
Figure 1: Grid scale still on scope face |
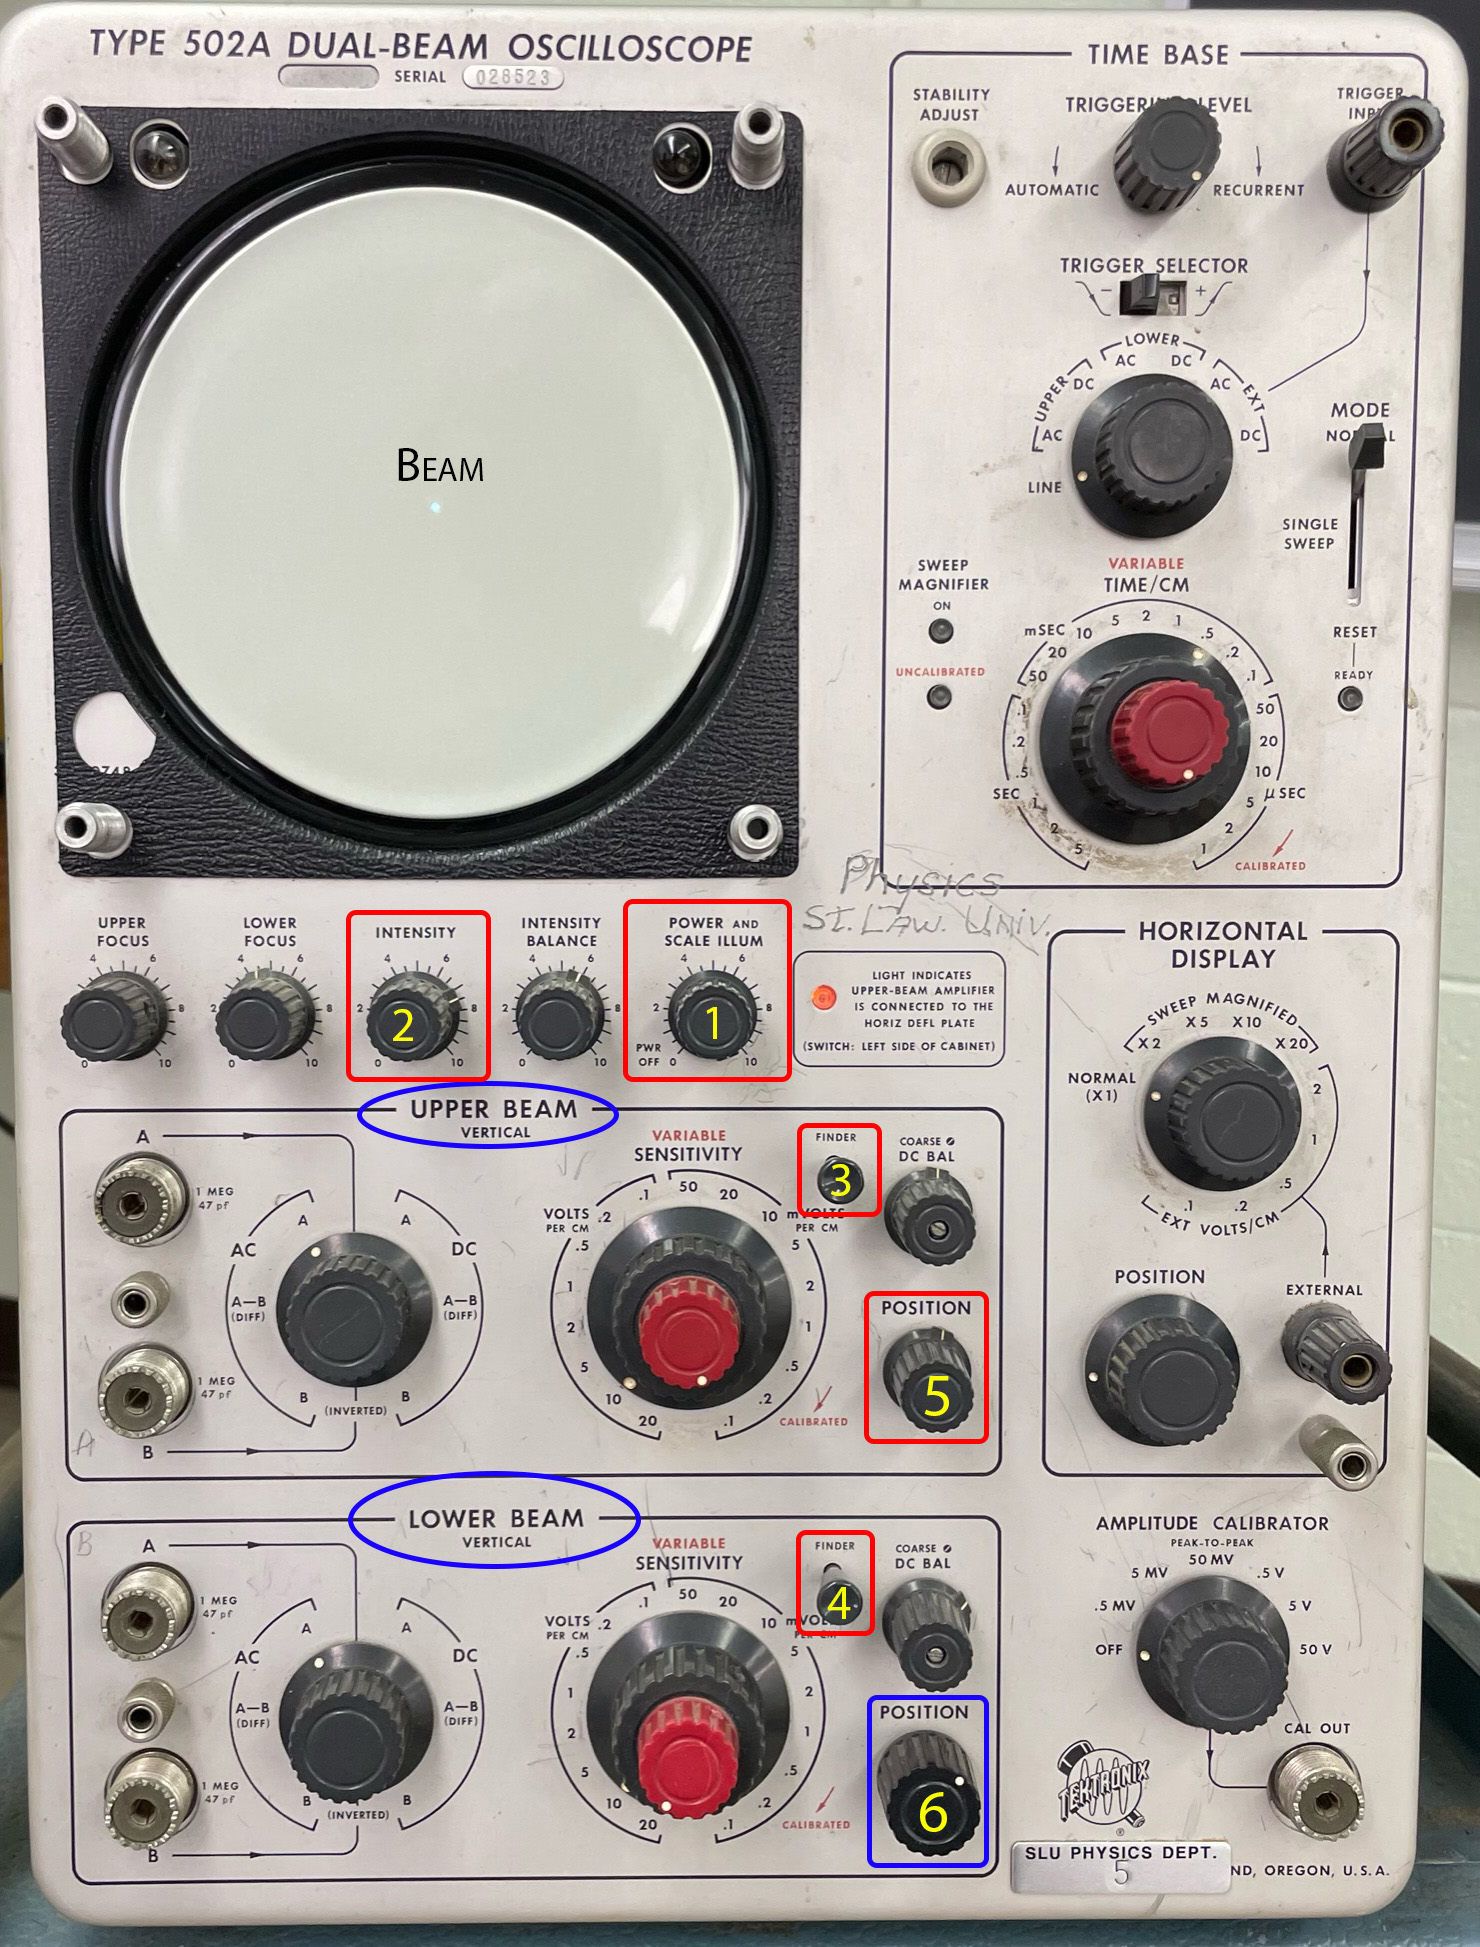
Figure 3:
Knobs for operation (numbered)
Click image for a larger view |
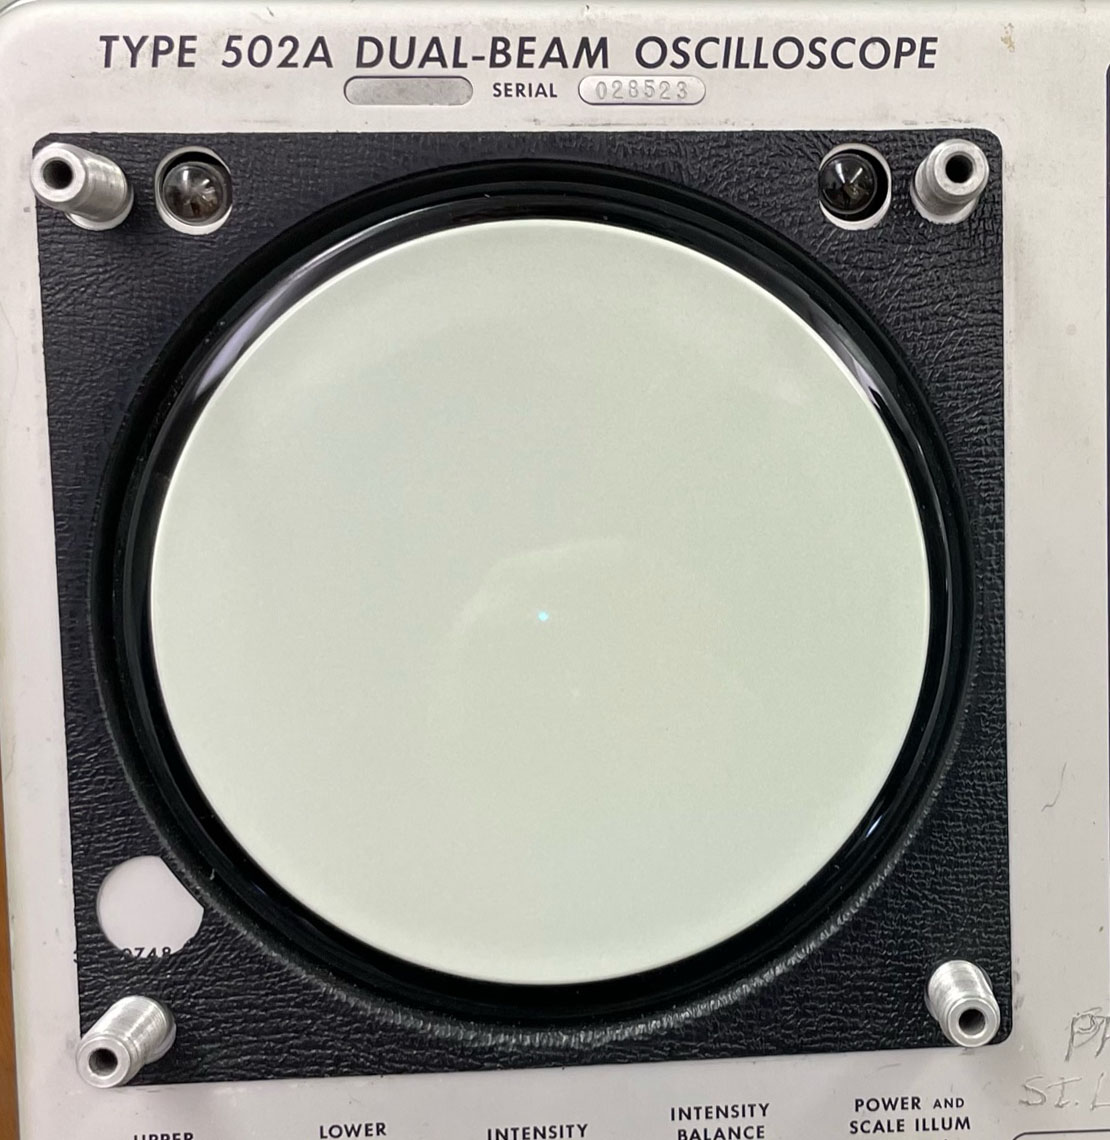
Figure 2: Grid scale removed |
|