Basic Idea:
| What: | How Many: | Where: | |
|---|---|---|---|
| Note: One Mercury source is used for two setups per bench! | |||
|
Pasco Mercury Light Source
See photo below |
1 | non-Majors storeroom, shelf DD3 | |
| The following components are for each setup; there are up to two setups per lab bench! | |||
|
Light Aperture
Assembly See photo below |
1 | non-Majors storeroom, shelf DD4 | |
|
Blazed diffraction grating
See photo below |
1 | non-Majors storeroom, shelf DD4 | |
|
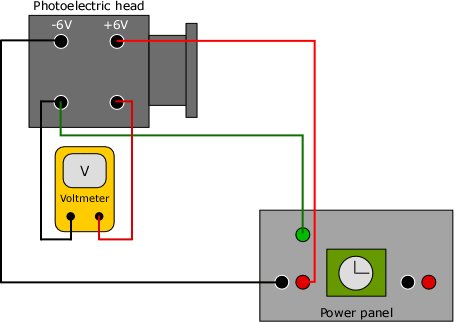
Photoelectric head
(Units A, B, D, E, F, G, H, I) See photo below |
1 | non-Majors storeroom, shelf DD4 | |
|
Support base
See photo below |
1 | non-Majors storeroom, shelf DD4 | |
|
Coupling bar
See photo below |
1 | non-Majors storeroom, shelf DD4 | |
|
Filters: green, yellow and variable transmission
See photo below |
1 each | non-Majors storeroom, shelf DD4 | |
| Light Block (optional - only needed when one side of Hg source is not used) |
1 | non-Majors storeroom, shelf DD4 | |
| Digital Multimeter |
1 | Majors storeroom, locked in steel cabinet | |
| Wires | Three – 36" or 48" (1 red, 1 black, 1 purple or gray - if possible) Two – 24" (1 red, 1 black) |
Bewkes 231 (Phys 152 Lab), Majors storeroom | |
| Flashlight | 2 | non-Majors storeroom, shelf CC3 | |
| The
following power supplies are set up under right front bench; Ask Jeff if we're using Two single- or One Dual-power supply! |
|||
| Either: Dual power supply | 1 | Majors storeroom, shelf C2 | |
|
Or: 40v
regulated power supply |
2 | Majors storeroom, shelf C2 | |
| Digital Multimeter |
1 | Majors storeroom, locked in steel cabinet | |
| Wires | Two – 12" (1 red, 1 black) Three – 36" (1 red, 1 black, 1 purple or gray) |
Bewkes 231 (Phys 152 Lab), Majors storeroom | |
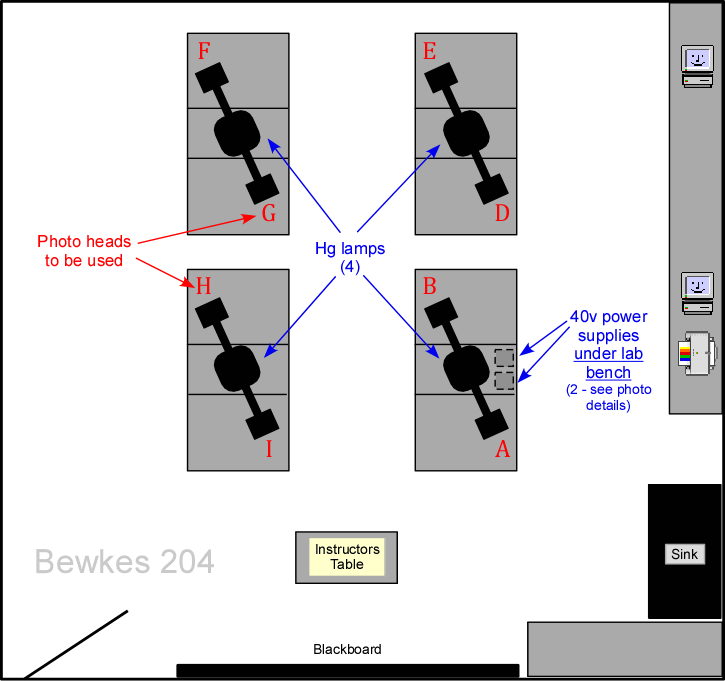
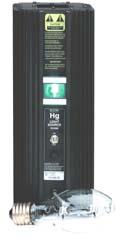
Image courtesy PASCO Scientific.
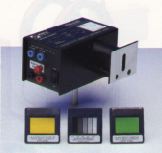
Image scanned from PASCO Scientific catalog.
Image scanned from PASCO Scientific Instruction Manual.
Image scanned from PASCO Scientific Instruction Manual.
 |
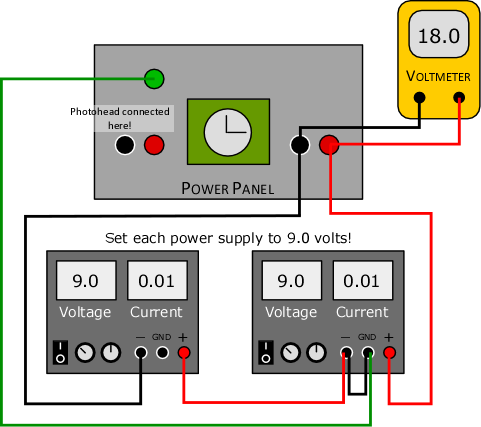 |
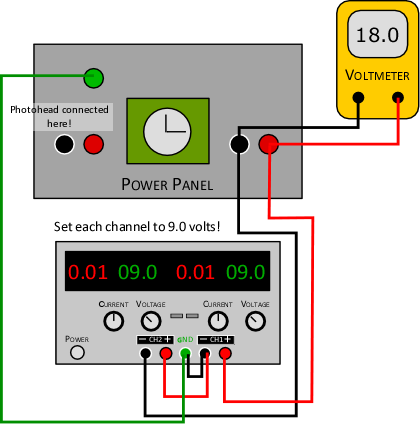
| Connection of Dual Power Supply | Connection of Two Single-Power Supplies |
|
|
||
| © | St. Lawrence University | Department of Physics |
| Revised: 12 Feb 20 | Canton, NY 13617 |