Basic Idea:
| What: | How Many: | Where: | |
|---|---|---|---|
| If possible, this experiment is to be installed in the 152 lab; Hopefully the schedule has been arranged so that 104 students move to the 152 lab |
|||
| Pasco Field Mapper Kit | 1 | non-Majors storeroom, shelf L5 | |
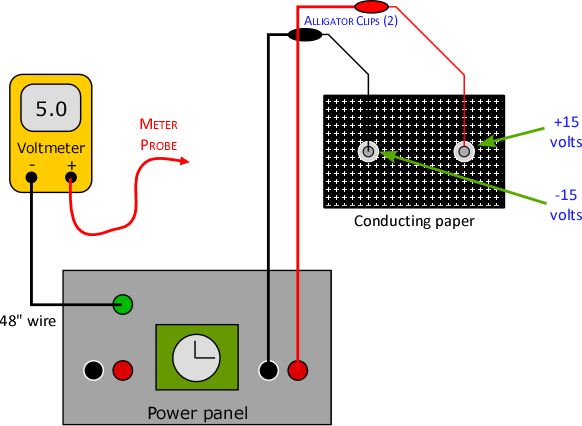
| Thin wires with aluminum eyelets (red and black) | 1 each | Inside Field Mapper Kit storage box | |
| Conducting paper with drawn charges | 1 | Inside Field Mapper Kit storage box | |
| Metal push-pins | 8 | Inside Field Mapper Kit storage box | |
| 9-volt DC battery | 1 | non-Majors storeroom, shelf L3 | |
| Digital multimeter |
1 | Majors storeroom, locked in steel cabinet | |
| Meter probe wire (red) | 1 | Majors storeroom, hanging in the center aisle | |
48" red wire |
1 | Bewkes 231 (Phys 152 Lab) | |
48" black wire |
2 | Bewkes 231 (Phys 152 Lab) | |
| Alligator clips (red and black) | 1 each | Majors storeroom, shelf B2 | |
| Place several multimeters on front bench (for spares) | |||
| Digital Multimeter |
2 | Majors storeroom, locked in steel cabinet | |
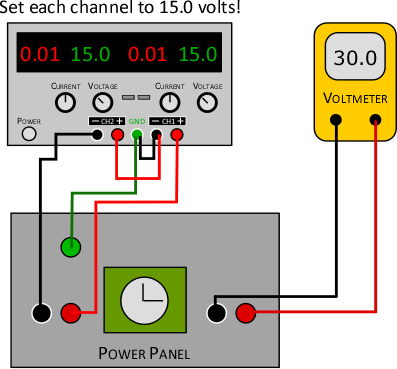
| The following components are installed on the front bench; Ask Jeff if we're using Two single- or One Dual-power supply! |
|||
| Either: Dual power supply (preferred) | 1 | Majors storeroom, shelf C2 | |
| Or: 40v regulated power supply |
2 | Majors storeroom, shelf C2 | |
| Digital Multimeter |
1 | Majors storeroom, shelf A3 | |
| Wires |
|
Bewkes 231 (Phys 152 Lab) | |
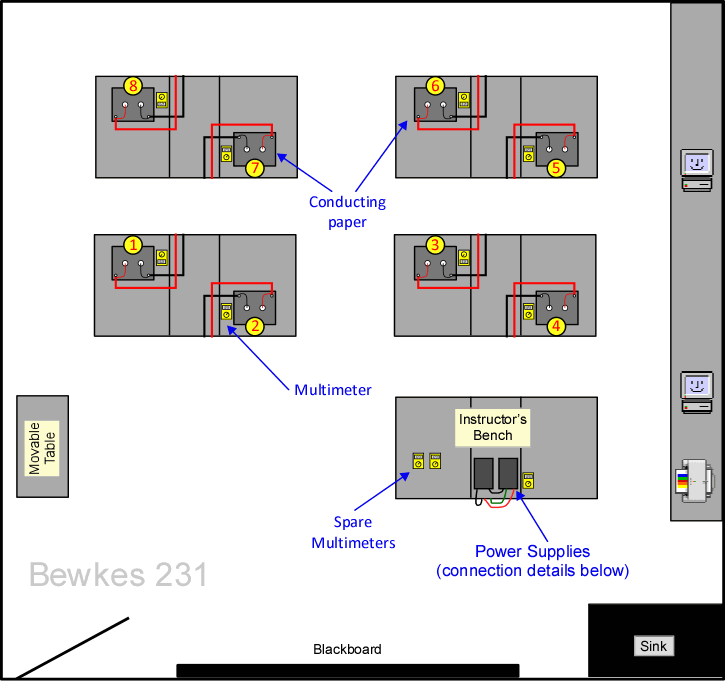
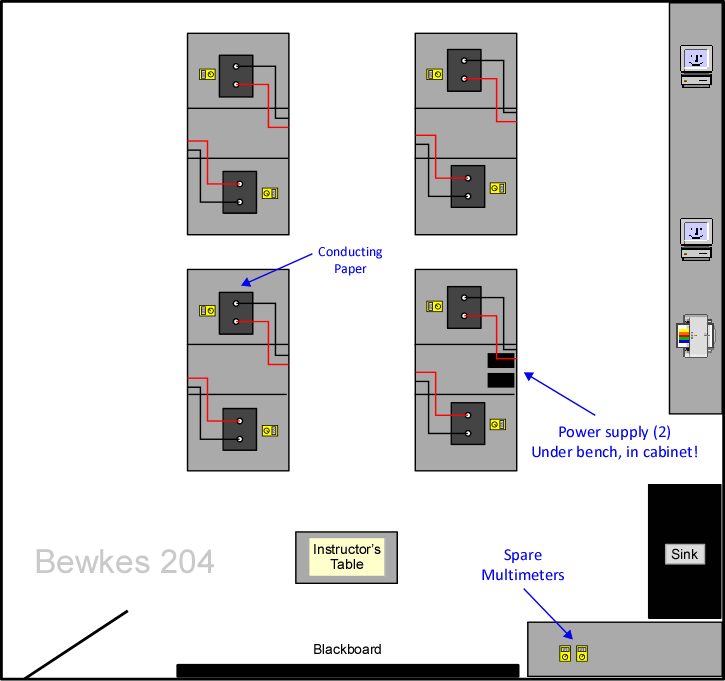
If needed, here's the room map for setting up in Bewkes 204
 |
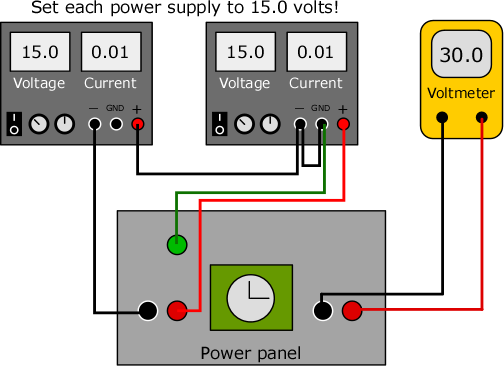 |
| Figure 1: Connection of Dual Power Supply | Figure 2: Connection of Two Single-Power Supplies |
|
|
||
| © | St. Lawrence University | Department of Physics |
| Revised: 23 Jan 26 | Canton, NY 13617 |